The Journey to Your Pilot’s License
Prerequisites and Eligibility
Every pilot’s licence begins with a paper trail, not a runway. In South Africa, your microlight lessons depend on prerequisites that the Civil Aviation Authority enforces without exception. Age matters. You need to be at least 16 to hold a student pilot permit and 17 before a full licence is issued.
Medical eligibility carries equal weight. A Class 4 medical certificate covers microlight operations, and it requires renewal at set intervals. The process also demands proof of identity and English proficiency.
Here is the standard checklist:
– Student pilot permit application
– Class 4 medical certificate
– South African ID or passport
– Radio telephony certificate
Only after these requirements are satisfied can you log your first dual-flight hour. Instructors verify every document before you approach the aircraft, so prepare accordingly.
Medical and Fitness Requirements
Your body is the first aircraft you must master. Before you climb into a cockpit for microlight lessons, the Civil Aviation Authority wants proof that your cardiovascular system, vision, and neurological function meet Class 4 standards. This isn’t a simple tick-box exercise. The designated medical examiner will test your blood pressure, check your eyesight against specific thresholds, and ask pointed questions about epilepsy, diabetes, or any history of blackouts. In my own examination, the doctor spent surprising time on my hearing as well.
During the assessment, expect focused attention on:
– Blood pressure and resting heart rate
– Visual acuity and colour perception
– History of vertigo or inner ear disorders
Fitness requirements extend beyond the doctor’s rooms. Students who arrive for microlight lessons with poor hydration, sleep debt, or medication that causes drowsiness will find their reaction times compromised. The cockpit magnifies small physical limitations. A mild cold can block your ears during ascent.
Minimum Age and Documentation
Sixteen years old is the earliest you can begin microlight lessons in South Africa, but the full licence waits until seventeen. That year between feels oddly suspended. You can master the circuits, feel the aircraft respond to your inputs, yet the paperwork remains unfinished until the birthday arrives.
Documentation follows a strict path. You will need your South African ID, two passport photographs, and a valid Class 4 medical certificate. The aviation authority also requires proof of residential address and a logbook with current instructor endorsements. A missing document stalls the application.
- South African ID or valid passport
- Two recent passport photographs
- Valid Class 4 medical certificate
- Proof of residential address
- Student logbook with instructor endorsements
Processing times vary, so submit everything early. Some students at my flight school waited six weeks, others three months. Your microlight lessons can continue meanwhile, but the licence only arrives once you turn seventeen.
What to Expect in Flight Training
Ground School and Theory Exams
The confidence of a microlight pilot is built before takeoff. Ground school for microlight lessons covers the theory behind every flight. You will work through the core subjects with an instructor:
- air law and airspace rules
- navigation and radio procedures
- meteorology and weather interpretation
- principles of flight and aircraft performance
Theory exams in South Africa follow a multiple choice format. They demand genuine understanding rather than rote memory. Expect to revisit weight and balance calculations until they feel instinctive. The questions link directly to decisions you make during microlight lessons, so it never feels abstract.
Schools structure the syllabus into blocks, allowing you to write each exam as you complete the material. Weather theory tends to trip up new students, yet it is the most rewarding subject once it clicks. This classroom phase lacks the glamour of your first solo, but it builds the judgment that keeps you safe later.
Dual Instruction with an Instructor
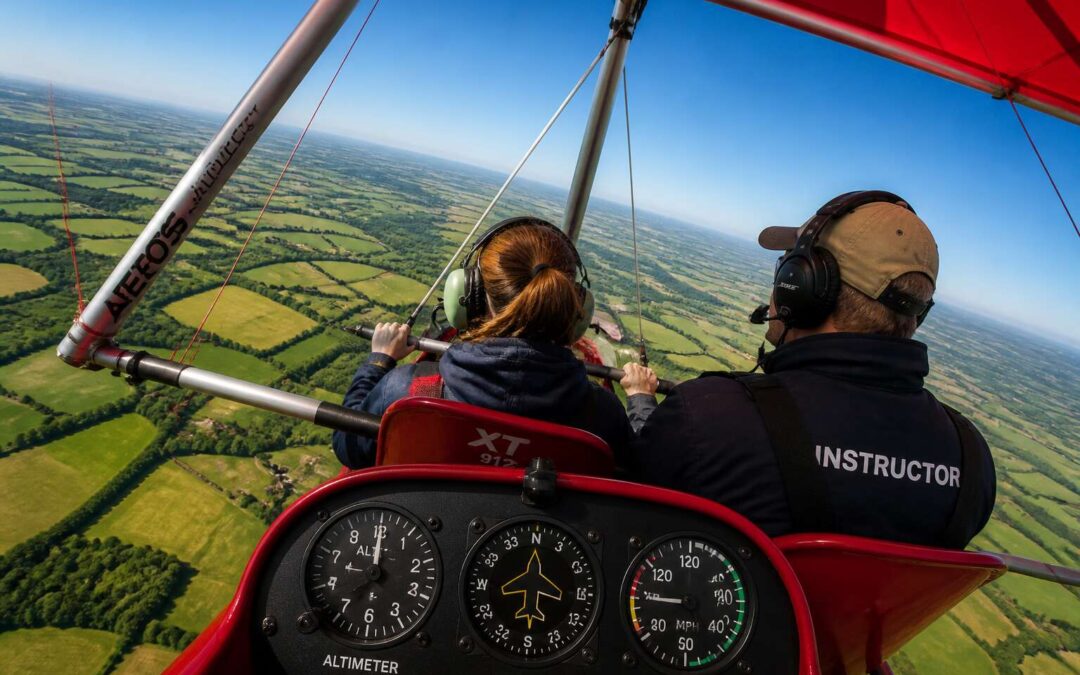
The runway looks wider from a microlight seat than it ever does from a car. Under dual instruction, the first lesson starts with the throttle, not the airspeed indicator. The instructor handles the radio calls, so you focus on holding the centre line. Most students spend the opening hours reading the wind sock and managing rudder pressures. Your hands will fight the controls at first. That is normal. The instructor gives one correction at a time, and those corrections fall into a rhythm:
- maintain altitude with small inputs
- pick a reference point on the horizon
- scan the instruments without staring
The runway soon moves at a speed your brain resists. By the third hour, the microlight lessons feel deliberate rather than chaotic. You learn the sight picture, the flare height, the moment to cut power. Dual instruction exists to make these decisions instinctive before you carry them alone.
Solo Flight Training Phases
The solo phase of microlight lessons begins without ceremony. Your instructor steps out of the aircraft and says nothing. You are alone with the controls. The first solo flight is a circuit. You climb to pattern altitude, turn downwind, and the quiet is absolute.
Your training prepared you for this. The flare height is memorised. The throttle response is instinctive. What changes is the absence of a voice. You handle the radio calls now, and every decision carries weight.
I remember the runway from my own first solo. It looked wider without an instructor!
Most students pass through three phases:
- Consolidation, repeating circuits until the pattern feels automatic.
- Solo circuits, monitored from the ground by your instructor.
- Solo local flying, exploring the airfield’s surrounds.
By the tenth hour, microlight lessons test your judgement. Your hands are quiet. Your inputs are smooth and deliberate.
Checkride and Practical Test Preparation
The checkride is where the syllabus ends and judgement begins! one examiner told me. In South Africa, the practical test for microlight lessons lasts around an hour. You will fly circuits, steep turns, and a forced landing. The examiner says nothing. They simply watch.
Preparation means flying with intent. Review your airspeed limits and the aircraft’s emergency procedures. Practice short-field landings until the flare feels instinctive. I remember my own test. The runway looked narrow!
- Pre-flight inspection without prompts
- Steep turns within altitude tolerance
- Simulated engine failure
- Crosswind landing technique
A mock checkride removes the surprise. It also shows you where the gaps are. On the day, fly the aircraft, not the examiner. The hours are in your logbook. Trust them.
Costs and Time Commitment
Aircraft Rental and Fuel Expenses
A wet rate between R1,500 and R2,300 per hour determines how quickly your microlight lessons progress. That figure includes both aircraft rental and fuel, and it varies across South African flight schools. A two stroke engine burns 15 to 20 litres per hour, so fuel alone adds R300 to R500 to every session. Rental rates for the aircraft itself typically land between R1,200 and R1,800.
Time commitment follows costs closely. In my experience, most students log between 15 and 25 flight hours before their training concludes with a checkride. Those hours seldom happen in one block! Weekends and early mornings at the airfield stretch the calendar over two to four months.
- Rental rates vary by aircraft type and maintenance schedule.
- Fuel prices shift monthly, which affects hourly costs.
- Instructor fees are billed separately from aircraft time.
Many schools bundle rental and fuel into a single wet rate, which simplifies tracking your spending on microlight lessons.
Instructor Fees and Hidden Costs
The advertised hourly rate for microlight lessons never tells the whole story. Instructor fees add another layer to your budget, and most South African flight schools charge between R350 and R550 per hour for dual instruction, billed separately from the wet rate. A two hour session in the air can therefore exceed R4,000 before you add anything else.
Hidden costs are quieter but just as real:
- Examination fees for the restricted radio licence
- Airfield landing fees at certain strips
- A headset, if you prefer your own over a shared one
- Student pilot licence processing charges
One detail that surprised me: some schools enforce a minimum monthly flying commitment. Fly less and you still pay. The school should provide a written breakdown of every fee before your first lesson.
Exam and Certification Charges
Certification charges tend to appear without warning. The microlight lessons budget usually covers flying time, yet the student pilot licence processing fee, the restricted radio examination charge, and the final flight test assessment each require their own payment. The time commitment is subtle: waiting for paperwork, rescheduling exams, and redoing administrative forms can consume weeks. South African aviation administration has a particular appetite for patience.
- Student pilot licence application: around R350
- Restricted radio licence exam: around R400
- Flight test administrative fee: around R250
These figures vary by school and examiner, but they share one trait: they request money before you earn a single new sky. Microlight lessons demand this financial forethought as much as they demand stick and rudder skill.
Average Training Duration and Pace
The average microlight lessons journey stretches longer than most student pilots anticipate. A typical training programme in South Africa spans three to six months, but that timeline assumes a consistent rhythm of two flights per week. Scheduling becomes the real obstacle. Highveld afternoons bring thunderstorms that ground aircraft for days. Cape winters arrive with low cloud and gusty southeasterlies. A student who books lessons around a full-time job often finds that weather, work, and fatigue stretch the syllabus toward eight months.
Pace matters more than raw hours. Two microlight lessons per week keep the muscle memory fresh and cockpit procedures familiar. Drop to one lesson weekly and the next session starts with a refresher lap of the circuit, costing time and money on skills you previously mastered. The gap between flights is where learners lose momentum.
- Dual instruction phase: 10 to 15 flight hours over four to six weeks
- Solo consolidation: 10 to 12 hours, often compressed into three weeks
- Cross-country and test preparation: 5 to 8 hours before the flight test
This timeline carries a direct financial consequence. A training programme that extends beyond six months rarely stays within the initial quote. Hangar fees, instructor availability, and currency checks continue regardless of whether you fly. Students who commit to microlight lessons with a fixed weekly slot spend less per hour of actual progress than those who fly in bursts between long pauses. The true cost of microlight lessons is measured in calendar days as much as in rands per hour.
Choosing the Right Flight School
Instructor Qualifications and Experience
An instructor’s logbook tells a story that no brochure can fake. In South Africa, where air currents shift without warning over the Highveld, the person beside you during microlight lessons is the single most important factor in your survival. Their qualifications, recorded with SACAA, form the first layer of trust.
Look for an instructor who holds a valid microlight instructor rating and a clean accident history. Experience appears in the calm of their voice and the precision of their briefings. Ask how many hours they have logged in the exact model you will fly.
- Verify their SACAA license and medical certificate
- Ask about total flight hours and teaching hours
- Request references from past students
Seasoned mentors anticipate turbulence before it arrives. They explain decisions in real time. That clarity, earned through years of repetition, transforms microlight lessons from a hobby into a discipline. The right instructor treats your fears with respect and your questions with patience.
Fleet Condition and Maintenance
Every microlight contains its history in the metal. Before you commit to microlight lessons, examine the fleet with suspicion. The condition of the wings, the tension of control cables, the lingering odour of fuel and corrosion. A neglected aircraft shows its problems in the details.
Request the maintenance records. South African air law requires precise, regular servicing. Inspect the logbooks for recent overhauls and recurring defects. A trustworthy school displays its paperwork openly. Aircraft that remain grounded for months raise questions.
The best schools replace worn parts without being asked. They track engine hours and airframe stress. Your safety depends on their vigilance. Open that hangar door and look closely. The silence of a well-maintained engine is the only reassurance you need.
Safety Record and Insurance Coverage
Safety records reveal a school’s character more honestly than any brochure. When you enquire about microlight lessons, ask for their incident history. A school with a clean record will share it without hesitation. Schools that deflect or obfuscate are hiding something. Insurance coverage matters equally. Verify that every aircraft, instructor, and student is insured for both dual instruction and solo flights. South African regulations require minimum liability, but adequate cover goes beyond legal limits.
- Request the school’s insurance certificate and policy expiry date.
- Confirm whether student pilots are covered for personal injury.
An insured school operates with calm diligence. Uninsured risks create silent pressure on instructors, who may push students to progress faster than prudent. Your journey into microlight lessons should rest on verified paperwork, not trust alone.
Student Reviews and Pass Rates
Pass rates are a reliable measure of a flight school’s integrity. Ask for recent examination statistics, not polished averages. An 80% first time pass rate reveals more than any testimonial wall. Student reviews, read with patience, expose the texture of daily instruction. Look for patterns across platforms. One complaint about an aircraft is noise. Five complaints about the same instructor are a signal.
Schools that publish transparent pass data tend to earn the most candid reviews. The two metrics usually align. When comparing microlight lessons, ask for this:
- Pass rates separated by dual and solo checkrides.
- Reviews from students who completed training, not those who merely started.
- The school’s pass rate compared with the national average.
Honest numbers indicate a school that respects your time and money.
Location and Weather Considerations
In South Africa, the airfield’s location is the first unspoken syllabus. A school in the Cape Peninsula fights relentless southeasterly winds. A Highveld field deals with afternoon thunderstorms and thin air. Both build character, but you will log more productive hours where conditions cooperate. Ask how many training days are lost monthly to wind or rain. That number is more honest than any brochure.
Consider what a specific field offers for microlight lessons:
- Runway orientation relative to prevailing wind.
- Proximity to controlled airspace and the delays that follow.
- Altitude above sea level and its effect on climb performance.
Weather dictates the rhythm of microlight lessons. Winter mornings in the Free State offer glassy air; by 11am, thermals rattle the wings. Schedule early sessions for calm landings. Confirm your instructor covers gusty crosswind technique during solo phases. A school that acknowledges density altitude in your training plan respects your progress.
Advanced Skills and Endorsements
Cross-Country Navigation and Radio Work
Cross-country flight is where your microlight lessons gain purpose. You plan a route, read the wind, and verify landmarks against the chart. Radio work requires precise language. In South Africa, controlled airspace and military zones demand clear calls. You learn to state your position, altitude, and intentions without hesitation.
A typical navigation exercise might include:
- Pre-flight weather and NOTAM briefing
- Plotting magnetic headings and ground speeds
- Radio handovers at each frequency boundary
Your instructor will observe your decisions, then review every deviation. The goal is autonomy. Compliance alone is insufficient. By the end, you navigate by reference to ground features and speak on the radio with calm efficiency.
Night Flying Endorsement
Night flying changes the microlight experience. The visual cues you relied on disappear, and your ears and instruments take over. In South Africa, a night flying endorsement requires extra training beyond the standard microlight lessons, usually five to ten hours depending on the school. You must prove you can handle circuits, diversions, and engine failure in darkness.
The training covers familiar tasks under unfamiliar conditions. You practise at your home airfield until the runway lights become routine, then move to quieter strips where there is no artificial horizon.
- Reading weather at night, when distant lightning and temperature changes are invisible
- Managing cockpit lighting and torch discipline
- Executing a controlled glide approach without visual reference to terrain
Your logbook entry must be signed by a grade II instructor or higher. The endorsement stays on your licence for life. After that, the night rating changes how you approach all microlight lessons, making you more deliberate about planning and checks.
Tailwheel and Mountain Training
A tailwheel endorsement makes you feel like a beginner again. The aircraft wants to ground loop the moment you lose focus, and you learn to use rudder with your whole body. That pressure sharpens your flying. It changes how you approach your standard microlight lessons, because every crosswind landing afterwards feels simple.
Mountain training takes you into the Drakensberg foothills or the Cape fold mountains. Altitude thins the air, density altitude stretches your takeoff roll, and valley winds behave unpredictably. You learn to plan escape routes and read cloud shadows. A typical course covers:
- Tailwheel ground handling and wheelbarrowing risks
- Mountain ridge crossings and forced landing selection
Transitioning to Other Light Aircraft
Your microlight lessons teach you finesse, but transitioning to other light aircraft rebuilds your sense of scale. A heavier airframe carries more energy, and energy management becomes the whole exercise. The controls feel less direct, the stall characteristics differ, and the cockpit layout changes your scan. You do not relearn to fly. You learn to fly again.
South African regulations value cross-crediting. Your microlight hours can count toward further endorsements, but only after completing differences training. That covers:
- Weight shift versus three-axis control responses
- Radio navigation and transponder operating procedures
- Constant speed propeller and flap management
Spending time in a new cockpit sharpens the instincts your earlier microlight lessons built. The transition humbles you first, and then it turns into quiet confidence.