by | Oct 12, 2026 | Blog
Understanding Microlight Aircraft Regulations in the USA
FAA Rules for Light Sport Aircraft
The FAA’s Light Sport Aircraft rules occupy a curious middle ground between ultralight toys and certified machines. When you begin hunting for microlight aircraft for sale usa, these regulations quietly determine everything from seat count to engine size. Most South African pilots find the American system refreshingly direct.
Under the LSA banner, a two seater with a fixed pitch propeller and a stall speed under 45 knots fits neatly. The gross weight ceiling sits at 600 kilograms for aeroplanes, which explains why these aircraft handle so lightly. The FAA also lets a valid driver’s licence substitute for a medical certificate, a gesture of trust that still surprises foreign pilots.
- Maximum speed at full power: 120 knots
- Fixed pitch propeller only
- No more than two occupants
That combination keeps the category simple. For anyone scanning the American market from Cape Town or Johannesburg, the LSA framework offers clarity, even if the paperwork takes time.
Weight and Speed Limits for Microlights
One hundred and fifteen kilograms. That is the entire empty weight allowance for an ultralight under FAA Part 103, and it disappears faster than most pilots expect. Speed limits press just as tightly. Maximum level flight hits 55 knots and stall speed caps at 24 knots. Cross any of those figures and your aircraft legally becomes something else. The rulebook demands:
- Empty weight cannot exceed 115 kilograms
- Maximum level flight speed stays at 55 knots
- Stall speed must not exceed 24 knots
- Only one occupant is permitted
For a South African buyer, the consequence is clear. Trust me, these numbers will change your shopping list. When you scan the market for microlight aircraft for sale usa, the specifications in each listing are not vague marketing figures. They are legal definitions. A machine that slips past the ultralight envelope requires registration, an airworthiness certificate, and a pilot with the right credentials.
Pilot Certification Requirements
Few buyers realize that most machines listed as microlight aircraft for sale usa do not require a pilot certificate at all. Under FAA Part 103, an ultralight pilot needs no license, no medical exam, and no logbook. That freedom evaporates the moment the machine crosses the legal envelope. A heavier or faster aircraft instantly demands a Sport Pilot certificate, a minimum of 20 hours of flight time, and a valid driver’s license as proof of fitness.
The South African buyer faces a hidden complication. Certifications earned in the USA do not transfer automatically. A locally rated pilot must verify reciprocity with the South African Civil Aviation Authority before flying an imported machine. The sequence matters:
– Confirm FAA Part 103 compliance or obtain the correct certificate
– Verify SACAA recognition of US pilot credentials
– Check import duty and registration timelines
Each item carries its own delay. Each delay costs money.
Registration and Airworthiness Standards
Most online listings for microlight aircraft for sale usa omit a crucial detail: whether the machine carries a valid registration or an airworthiness certificate. The FAA does not require either for a true Part 103 ultralight. That simplicity vanishes once the aircraft exceeds the legal limits or the buyer intends to fly internationally. I have watched buyers walk away from otherwise perfect machines because the paperwork failed.
South African buyers face three documentation questions:
- Whether the seller holds a bill of sale
- Whether the aircraft has a data plate
- Whether import documentation matches the serial number
The SACAA treats a US registered aircraft differently from an unregistered ultralight. Airworthiness standards follow the country of origin, but local acceptance depends on proof. Without that proof, the machine remains unairworthy. For anyone scanning microlight aircraft for sale usa, registration status determines everything that follows.
Types of Microlight Aircraft Available
Fixed-Wing Microlights
Fixed-wing microlights are the sensible rebels of the aviation world. They offer unfiltered flight without a pressurised cabin or autopilot, and they demand your full attention. For pilots combing through microlight aircraft for sale USA, the choice rarely comes down to luxury. It comes down to character.
These machines split into two categories with distinct temperaments. Strutted wings are forgiving and calm, quite at home on rough grass strips. Cantilever wings are quicker and sleeker, but they watch your every input like a strict driving instructor.
– Strutted models tolerate heavy-handed control and bumpy landings.
– Cantilever designs reward smooth handling and precise coordination.
Every pilot has a favourite, which guarantees arguments at any airfield. The only rational approach when reviewing microlight aircraft for sale USA is to match the wing to your own habits on the ground and in the air.
Flex-Wing Trikes
There is no fuselage to hide inside a flex-wing trike. You sit in the open, under a wing that moves with your body, not against it. This is weight-shift control, and it changes the moral contract of flight. In a fixed-wing, you command the machine. In a trike, you become the machine. The wing reads your lean, your balance, your hesitation.
For pilots reviewing microlight aircraft for sale USA, trikes are the purest expression of vulnerability. They do not forgive absent-mindedness. They reward those who accept the wind as a partner, not an obstacle. The experience is raw, loud, and honest. Some find it uncomfortable. Others find it liberating.
- Trikes offer exceptional visibility, with no wing above your head.
- They are simpler to maintain, with fewer moving parts in the control system.
- Their slow-speed handling suits pilots who value feeling over precision.
That simplicity carries a cost. The wing is a sail, and the sail responds to turbulence. You must stay present. This is not a machine for passive pilots. It is a machine for those who want to remember that flight is a physical act, not a digital convenience.
Powered Parachutes
Powered parachutes replace speed with a different virtue. The wing is a fabric canopy that inflates only after thrust gets you moving. No rigid structure, no ailerons, no control cables running to wing tips. You steer with pedals pulling brake lines, which distorts the canopy’s trailing edge.
These aircraft cruise near twenty five knots, with a gentle rocking motion over thermals. Stall behavior is forgiving, but wind gusts remain a real concern. They demand constant attention to current conditions.
- Preflight checks focus on lines, risers, and canopy fabric
- Launch needs a clear, straight strip, but length is generous
- Landing approaches are steep,with minimal ground roll
Evaluators browsing microlight aircraft for sale usa will notice that powered parachutes occupy a niche for those who prioritize simplicity over speed. The experience is tactile, immediate and unapologetically slow.
Gyrocopters
The gyrocopter demands respect. The rotor overhead spins not from an engine, but from the force of the air itself. That free-spinning disc generates lift through autorotation, a phenomenon that requires forward motion. Stop moving, and the rotor stops forgiving.
A gyrocopter is not a helicopter. It cannot hover. I have watched pilots treat them with an almost religious respect. They push with a rear propeller, while the rotor turns with eerie calm. The flight is slow and deliberate, closer to sinking than climbing. The thrum of the blades stays with you long after landing.
When you browse microlight aircraft for sale usa, gyrocopters stand apart. They are not toys. The unloaded rotor can tuck under in a moment of carelessness. You fly them with a light hand and a heavy sense of consequence.
Kit-Built vs Ready-to-Fly
Every aircraft requires trust. The kit trusts you to build it correctly. The ready-to-fly trusts a factory you have never met. When you browse microlight aircraft for sale usa, this distinction shapes the entire experience.
The kit forces you to learn each bolt, each cable, each flaw. The ready-to-fly machine hides those details. It arrives complete, leaving you to discover its behaviour in flight, not in construction. For those comparing microlight aircraft for sale usa, the question is not which is safer, but which kind of ownership you can accept.
Neither path is superior. The kit rewards perseverance. The ready-to-fly rewards decisiveness. Some pilots need to build before they can trust. Others trust immediately. Both are valid, but they are not the same.
Where to Find Microlight Aircraft for Sale in the USA
Online Marketplaces and Classifieds
One idle evening on a major classifieds site, you can spot a low-hour machine listed for less than a family SUV. That is the reality of the used market. A focused search for microlight aircraft for sale usa pulls up everything from open-air singles to enclosed touring models.
The biggest platforms let you sort by engine time, airframe condition, and distance from a chosen airport. Private sellers often upload dozens of photos and maintenance records. This makes cross-country price comparisons straightforward.
- Barnstormers remains the busiest online marketplace for light aviation.
- Trade-A-Plane carries a steady mix of aircraft and spares.
- Aviation-specific Facebook groups host regional sellers who avoid the big sites.
For a buyer working from South Africa, watch these listings closely. They refresh hourly. Save a search for microlight aircraft for sale usa on two or three platforms, because the best deals rarely linger beyond a week.
Aircraft Dealerships and Brokers
Dealers and brokers operate differently from classifieds. A broker acts as your agent, scouring hangars for a microlight aircraft for sale usa that matches your logbook and your wallet. Dealerships hold inventory, often with fresh annuals and new tyres. Both charge a premium, but they reduce risk for a buyer in Johannesburg or Cape Town who cannot fly to Ohio at short notice.
A good broker will:
- Verify the airframe’s history with the FAA.
- Arrange a pre-purchase inspection.
- Handle deposit escrow.
Their fees look steep until you price a missed defect. For serious buyers, that cost is simply the price of certainty.
Aviation Forums and Community Groups
Online forums are the drawing rooms of aviation, where reputation travels faster than a Cessna on a tailwind. When someone lists a microlight aircraft for sale usa, the conversation around it often tells a truer story than the photos do. I have watched owners answer tough questions with grace, and seen others deflect with the elegance of a politician caught mid-scandal. The difference is visible in minutes.
A classified ad gives you the price. A forum thread gives you the owner’s temperament, which matters when you are buying something built by hand. You can follow a seller’s past posts about maintenance, modifications, and mishaps. That record is worth a thousand pre-purchase checklists.
Useful spaces for this research:
- PilotsofAmerica forums, where microlight owners gather and grumble beautifully.
- HomebuiltAirplanes, strong on technical detail and occasional drama.
- Regional Facebook groups, especially those tied to flying clubs in Florida or Arizona.
Community groups also connect you to mechanics and instructors who know specific airframes. Their opinions on a microlight aircraft for sale usa can save you from a costly infatuation. I have found that a short, polite post asking for local advice produces better leads than weeks of cold browsing. People enjoy being the expert. Let them.
Auctions and Government Surplus
I have attended three government auctions and each taught me patience. The most surprising lesson came from a GSA lot that looked empty until the auctioneer pulled back a tarp and revealed a tired but complete flex-wing trike. Most attendees come for trucks and office furniture, which means fewer eyes on the aircraft.
Watch GSA Auctions, the FAA’s public surplus listings, and county sheriff sales in states like Texas and Colorado. Bankruptcy liquidations from flying schools also appear regularly on auction platforms.
Three realities before bidding:
- Inspect personally or send a mechanic; photographs lie comfortably.
- Government surplus rarely includes logbooks or maintenance records.
- Factor in transport costs, since these machines rarely sit near an airport.
A microlight aircraft for sale usa through auction rewards the buyer who checks the paperwork and sticks to their limit. The bargain exists, but only for those willing to dig.
Local Flying Clubs and Events
Flying clubs hold a different kind of inventory. Walk into a clubhouse on Saturday morning and you will hear engines being discussed alongside coffee. The trike in the corner often has a story and a price tag. I found my best aircraft this way, through a bulletin board notice and a handshake.
Fly-ins and regional rallies matter just as much. Pilots trailer their machines for hundreds of miles to attend. These gatherings create a live market where a microlight aircraft for sale usa gets evaluated on grass strips and in real crosswinds. The crowd tends to gather around any new arrival, which means owners expect questions.
A few starting points:
– United States Ultralight Association chapter meetings
– EAA chapter pancake breakfasts and hangar days
The people at these events maintain their own aircraft. They can recite the full history of a machine, from the original kit to the latest repair. Conversation reveals what photographs never will.
Key Considerations When Buying a Used Microlight
Airframe and Engine Condition
The most expensive part of a bargain aircraft is often the engine. Buying a used microlight aircraft for sale usa demands inspection of two components: the airframe andthe engine. Determine airframe integrity first, then engine reliability. Both require scrutiny or expect financial pain later.
Inspect the airframe for corrosion at welds and attachment points. Check fabric fortears, sun damage, orresealed patches. Improper repairs end the deal. For the engine, hours matter less thanmaintenance history. A low-time engine that sat idle can be trouble. Verify logbooks against service intervals.
- Run a compression test on each cylinder
- Examine fuel lines for cracks or leaks
- Inspect exhaust for soot or oil residue
A used aircraft offers savings, but only if both pass muster. Someone else can inherit headaches.
Maintenance Logs and Inspections
When you search microlight aircraft for sale usa, the logbook carries the answer. Missing entries, inconsistent signatures, and dates that do not align with repair orders should end the conversation. A properly signed inspection record holds more value than a fresh coat of paint.
Review the airworthiness directive compliance records. A seller who cannot produce the original authorization for a major repair is hiding something. Look for 100-hour or annual condition inspections that follow a rhythm. The maintenance pattern reveals how the owner treated the machine.
- Check for oil change intervals that align with calendar time, not just flight hours
- Verify that each repair matches the manufacturer’s approved procedures
- Cross reference logbook dates against the aircraft registration renewal cycle
A clean paper trail is rare. Most used microlights have gaps, stains, or rushed entries. Those gaps align with expensive surprises, especially when you shop microlight aircraft for sale usa.
Corrosion and Damage History
Corrosion is the slow killer. It grounds more microlights than mechanical failure ever will. When you search microlight aircraft for sale usa, the real examination begins under the paint. Look at the aluminium near the battery box, the steel in the tailcone, and the magnesium in the wheel castings. These are the first places to surrender.
Damage history is a story of stress. A wing that has cartwheeled once will never carry a load the same way again. The repair might look perfect, but the fatigue map is permanent.
- Surface blisters that weep white or grey residue.
- Flaking around rivet lines that suggests movement.
- Mismatched primer tones revealing patched sections.
A seller who shrugs at these details has already told you everything.
Total Cost of Ownership
Sticker prices are seductive, but they never tell the whole story. When you search microlight aircraft for sale usa, the real cost of ownership reveals itself over time. It lives in hangar fees, insurance, annual condition inspections, and the deterioration of rubber hoses and fuel lines. A bargain airframe can become a serious financial drain within months if you ignore these numbers.
Most buyers build their budget around the purchase price alone, yet the recurring expenses stack up quickly:
- Hangarage or tie-down fees
- Engine overhaul reserves
- Insurance based on your flight hours
- Consumables like brake pads and tyres
I’ve watched pilots admire a clean cockpit while the engine sat two hundred hours past its recommended TBO. The purchase price only begins the financial commitment. Next time you browse microlight aircraft for sale usa, ask about the hourly operating cost. The seller who quotes that figure without flinching has already made peace with the real price of flight.
Test Flight and Pre-Purchase Inspection
The test flight is where promise meets reality. A pre-purchase inspection confirms the airframe is sound, but only airborne time reveals how a machine behaves. When you browse microlight aircraft for sale usa, a seller’s description fades quickly at altitude.
During the test flight, pay attention to control response and stability. A well-rigged aircraft flies hands-off for a few seconds. It tracks straight on takeoff and lands predictably. Engine acceleration should be smooth, without hesitation or rough spots. A subtle vibration or odd noise will amplify after purchase.
The inspection covers what the test flight cannot:
- Control cable tension and pulley wear
- Fuel tank integrity and fuel line condition
- Propeller condition and track
- Undercarriage bushings and attachment points
An independent inspector with Light Sport Aircraft experience finds issues that escape untrained eyes. When comparing microlight aircraft for sale usa, the test flight and inspection form a continuous evaluation.
Financing and Insurance for Microlight Aircraft
Loan Options for Light Sport Aircraft
Financing a microlight in the USA is simpler than most South African buyers expect. American credit unions and aviation lenders treat light sport aircraft as a distinct category, and loan terms reflect the lower price point. A used trike or fixed-wing machine can qualify with a modest deposit if the logbooks are current.
Insurance is the quieter puzzle. Underwriters consider your total flight time, ratings, and home airfield when pricing hull coverage. For a buyer importing a microlight aircraft for sale usa, the premium shifts depending on whether the machine is flown under Part 103 or as a light sport aircraft. Some carriers demand a tailwheel endorsement before issuing liability cover.
When you shop for a loan, structure matters more than the rate. Consider these points:
– The loan-to-value ratio on a kit-built versus a factory-built airframe.
– Whether the lender will hold a lien on an FAA-registered aircraft.
– The repayment window, which is usually shorter than a car loan.
– Whether the insurer requires a named pilot.
Insurance Requirements and Premiums
Insurance underwriters have a peculiar fondness for pilots with logbooks full of cross-country trips. Buying a microlight aircraft for sale usa from a dealer in Florida does not impress them. They want to see your total flight time, the condition of your hangar, and whether your home airfield has a paved runway or a cow pasture.
- Hull coverage premiums often triple for owners who keep trikes tied down outdoors.
- Some carriers require a named pilot with a minimum of 100 hours in category.
- Liability policies may exclude passengers if you fly a powered parachute.
A clean hangar and a current medical certificate will not lower your premium, but they will keep the underwriter from smirking when your application reaches their desk. The real pricing battle begins when you explain that your microlight aircraft for sale usa import has a folding wing. Expect questions, maybe a phone call, and certainly a survey.
Storage and Hangar Costs
Few buyers of a microlight aircraft for sale usa calculate hangar fees before they sign. That is a mistake. Storage can eat as much as fifteen percent of your annual operating budget. In South Africa, coastal humidity attacks fabric and untreated steel with a persistence that border on malicious.
Financing a microlight often requires a storage plan. Some lenders demand proof of a hangar before they release funds. Others will factor the monthly fee into your debt service ratio. The underwriting desk cares less about the aircraft and more about whether you can shelter it.
- T-hangar rental at a municipal airfield, often the safest and priciest option.
- Community hangar sharing, which splits cost but not risk.
- Shade port or “carport” storage, cheap but still open to windblown dust.
Your premium for hull insurance drops considerably when the trike sleeps indoors. A covered storage arrangement is often the cheapest single upgrade to your ownership risk profile.
Resale Value and Depreciation
Depreciation on a microlight is steep in the first two years. In South Africa, a flex-wing trike loses 30% of its value before the engine reaches 100 hours. That fact should shape financing choices!
Lenders underwrite against collateral. They calculate the loan-to-value ratio based on a book that lags reality. If you finance a microlight aircraft for sale usa with a five year term, you might owe more than the machine is worth by year three. Negative equity locks you into the asset, reducing your flexibility to upgrade or exit.
Insurance premiums reflect risk of total loss. A crash writes off the aircraft, and the payout is based on agreed value, not market value. Choosing a higher excess or a proven maintenance schedule can lower premiums, but it also affects the recorded history that a future buyer will scrutinize. These variables, not the purchase price, determine your resale position.
by | Oct 12, 2026 | Blog
The Journey to Your Pilot’s License
Prerequisites and Eligibility
Every pilot’s licence begins with a paper trail, not a runway. In South Africa, your microlight lessons depend on prerequisites that the Civil Aviation Authority enforces without exception. Age matters. You need to be at least 16 to hold a student pilot permit and 17 before a full licence is issued.
Medical eligibility carries equal weight. A Class 4 medical certificate covers microlight operations, and it requires renewal at set intervals. The process also demands proof of identity and English proficiency.
Here is the standard checklist:
– Student pilot permit application
– Class 4 medical certificate
– South African ID or passport
– Radio telephony certificate
Only after these requirements are satisfied can you log your first dual-flight hour. Instructors verify every document before you approach the aircraft, so prepare accordingly.
Medical and Fitness Requirements
Your body is the first aircraft you must master. Before you climb into a cockpit for microlight lessons, the Civil Aviation Authority wants proof that your cardiovascular system, vision, and neurological function meet Class 4 standards. This isn’t a simple tick-box exercise. The designated medical examiner will test your blood pressure, check your eyesight against specific thresholds, and ask pointed questions about epilepsy, diabetes, or any history of blackouts. In my own examination, the doctor spent surprising time on my hearing as well.
During the assessment, expect focused attention on:
– Blood pressure and resting heart rate
– Visual acuity and colour perception
– History of vertigo or inner ear disorders
Fitness requirements extend beyond the doctor’s rooms. Students who arrive for microlight lessons with poor hydration, sleep debt, or medication that causes drowsiness will find their reaction times compromised. The cockpit magnifies small physical limitations. A mild cold can block your ears during ascent.
Minimum Age and Documentation
Sixteen years old is the earliest you can begin microlight lessons in South Africa, but the full licence waits until seventeen. That year between feels oddly suspended. You can master the circuits, feel the aircraft respond to your inputs, yet the paperwork remains unfinished until the birthday arrives.
Documentation follows a strict path. You will need your South African ID, two passport photographs, and a valid Class 4 medical certificate. The aviation authority also requires proof of residential address and a logbook with current instructor endorsements. A missing document stalls the application.
- South African ID or valid passport
- Two recent passport photographs
- Valid Class 4 medical certificate
- Proof of residential address
- Student logbook with instructor endorsements
Processing times vary, so submit everything early. Some students at my flight school waited six weeks, others three months. Your microlight lessons can continue meanwhile, but the licence only arrives once you turn seventeen.
What to Expect in Flight Training
Ground School and Theory Exams
The confidence of a microlight pilot is built before takeoff. Ground school for microlight lessons covers the theory behind every flight. You will work through the core subjects with an instructor:
- air law and airspace rules
- navigation and radio procedures
- meteorology and weather interpretation
- principles of flight and aircraft performance
Theory exams in South Africa follow a multiple choice format. They demand genuine understanding rather than rote memory. Expect to revisit weight and balance calculations until they feel instinctive. The questions link directly to decisions you make during microlight lessons, so it never feels abstract.
Schools structure the syllabus into blocks, allowing you to write each exam as you complete the material. Weather theory tends to trip up new students, yet it is the most rewarding subject once it clicks. This classroom phase lacks the glamour of your first solo, but it builds the judgment that keeps you safe later.
Dual Instruction with an Instructor
The runway looks wider from a microlight seat than it ever does from a car. Under dual instruction, the first lesson starts with the throttle, not the airspeed indicator. The instructor handles the radio calls, so you focus on holding the centre line. Most students spend the opening hours reading the wind sock and managing rudder pressures. Your hands will fight the controls at first. That is normal. The instructor gives one correction at a time, and those corrections fall into a rhythm:
- maintain altitude with small inputs
- pick a reference point on the horizon
- scan the instruments without staring
The runway soon moves at a speed your brain resists. By the third hour, the microlight lessons feel deliberate rather than chaotic. You learn the sight picture, the flare height, the moment to cut power. Dual instruction exists to make these decisions instinctive before you carry them alone.
Solo Flight Training Phases
The solo phase of microlight lessons begins without ceremony. Your instructor steps out of the aircraft and says nothing. You are alone with the controls. The first solo flight is a circuit. You climb to pattern altitude, turn downwind, and the quiet is absolute.
Your training prepared you for this. The flare height is memorised. The throttle response is instinctive. What changes is the absence of a voice. You handle the radio calls now, and every decision carries weight.
I remember the runway from my own first solo. It looked wider without an instructor!
Most students pass through three phases:
- Consolidation, repeating circuits until the pattern feels automatic.
- Solo circuits, monitored from the ground by your instructor.
- Solo local flying, exploring the airfield’s surrounds.
By the tenth hour, microlight lessons test your judgement. Your hands are quiet. Your inputs are smooth and deliberate.
Checkride and Practical Test Preparation
The checkride is where the syllabus ends and judgement begins! one examiner told me. In South Africa, the practical test for microlight lessons lasts around an hour. You will fly circuits, steep turns, and a forced landing. The examiner says nothing. They simply watch.
Preparation means flying with intent. Review your airspeed limits and the aircraft’s emergency procedures. Practice short-field landings until the flare feels instinctive. I remember my own test. The runway looked narrow!
- Pre-flight inspection without prompts
- Steep turns within altitude tolerance
- Simulated engine failure
- Crosswind landing technique
A mock checkride removes the surprise. It also shows you where the gaps are. On the day, fly the aircraft, not the examiner. The hours are in your logbook. Trust them.
Costs and Time Commitment
Aircraft Rental and Fuel Expenses
A wet rate between R1,500 and R2,300 per hour determines how quickly your microlight lessons progress. That figure includes both aircraft rental and fuel, and it varies across South African flight schools. A two stroke engine burns 15 to 20 litres per hour, so fuel alone adds R300 to R500 to every session. Rental rates for the aircraft itself typically land between R1,200 and R1,800.
Time commitment follows costs closely. In my experience, most students log between 15 and 25 flight hours before their training concludes with a checkride. Those hours seldom happen in one block! Weekends and early mornings at the airfield stretch the calendar over two to four months.
- Rental rates vary by aircraft type and maintenance schedule.
- Fuel prices shift monthly, which affects hourly costs.
- Instructor fees are billed separately from aircraft time.
Many schools bundle rental and fuel into a single wet rate, which simplifies tracking your spending on microlight lessons.
Instructor Fees and Hidden Costs
The advertised hourly rate for microlight lessons never tells the whole story. Instructor fees add another layer to your budget, and most South African flight schools charge between R350 and R550 per hour for dual instruction, billed separately from the wet rate. A two hour session in the air can therefore exceed R4,000 before you add anything else.
Hidden costs are quieter but just as real:
- Examination fees for the restricted radio licence
- Airfield landing fees at certain strips
- A headset, if you prefer your own over a shared one
- Student pilot licence processing charges
One detail that surprised me: some schools enforce a minimum monthly flying commitment. Fly less and you still pay. The school should provide a written breakdown of every fee before your first lesson.
Exam and Certification Charges
Certification charges tend to appear without warning. The microlight lessons budget usually covers flying time, yet the student pilot licence processing fee, the restricted radio examination charge, and the final flight test assessment each require their own payment. The time commitment is subtle: waiting for paperwork, rescheduling exams, and redoing administrative forms can consume weeks. South African aviation administration has a particular appetite for patience.
- Student pilot licence application: around R350
- Restricted radio licence exam: around R400
- Flight test administrative fee: around R250
These figures vary by school and examiner, but they share one trait: they request money before you earn a single new sky. Microlight lessons demand this financial forethought as much as they demand stick and rudder skill.
Average Training Duration and Pace
The average microlight lessons journey stretches longer than most student pilots anticipate. A typical training programme in South Africa spans three to six months, but that timeline assumes a consistent rhythm of two flights per week. Scheduling becomes the real obstacle. Highveld afternoons bring thunderstorms that ground aircraft for days. Cape winters arrive with low cloud and gusty southeasterlies. A student who books lessons around a full-time job often finds that weather, work, and fatigue stretch the syllabus toward eight months.
Pace matters more than raw hours. Two microlight lessons per week keep the muscle memory fresh and cockpit procedures familiar. Drop to one lesson weekly and the next session starts with a refresher lap of the circuit, costing time and money on skills you previously mastered. The gap between flights is where learners lose momentum.
- Dual instruction phase: 10 to 15 flight hours over four to six weeks
- Solo consolidation: 10 to 12 hours, often compressed into three weeks
- Cross-country and test preparation: 5 to 8 hours before the flight test
This timeline carries a direct financial consequence. A training programme that extends beyond six months rarely stays within the initial quote. Hangar fees, instructor availability, and currency checks continue regardless of whether you fly. Students who commit to microlight lessons with a fixed weekly slot spend less per hour of actual progress than those who fly in bursts between long pauses. The true cost of microlight lessons is measured in calendar days as much as in rands per hour.
Choosing the Right Flight School
Instructor Qualifications and Experience
An instructor’s logbook tells a story that no brochure can fake. In South Africa, where air currents shift without warning over the Highveld, the person beside you during microlight lessons is the single most important factor in your survival. Their qualifications, recorded with SACAA, form the first layer of trust.
Look for an instructor who holds a valid microlight instructor rating and a clean accident history. Experience appears in the calm of their voice and the precision of their briefings. Ask how many hours they have logged in the exact model you will fly.
- Verify their SACAA license and medical certificate
- Ask about total flight hours and teaching hours
- Request references from past students
Seasoned mentors anticipate turbulence before it arrives. They explain decisions in real time. That clarity, earned through years of repetition, transforms microlight lessons from a hobby into a discipline. The right instructor treats your fears with respect and your questions with patience.
Fleet Condition and Maintenance
Every microlight contains its history in the metal. Before you commit to microlight lessons, examine the fleet with suspicion. The condition of the wings, the tension of control cables, the lingering odour of fuel and corrosion. A neglected aircraft shows its problems in the details.
Request the maintenance records. South African air law requires precise, regular servicing. Inspect the logbooks for recent overhauls and recurring defects. A trustworthy school displays its paperwork openly. Aircraft that remain grounded for months raise questions.
The best schools replace worn parts without being asked. They track engine hours and airframe stress. Your safety depends on their vigilance. Open that hangar door and look closely. The silence of a well-maintained engine is the only reassurance you need.
Safety Record and Insurance Coverage
Safety records reveal a school’s character more honestly than any brochure. When you enquire about microlight lessons, ask for their incident history. A school with a clean record will share it without hesitation. Schools that deflect or obfuscate are hiding something. Insurance coverage matters equally. Verify that every aircraft, instructor, and student is insured for both dual instruction and solo flights. South African regulations require minimum liability, but adequate cover goes beyond legal limits.
- Request the school’s insurance certificate and policy expiry date.
- Confirm whether student pilots are covered for personal injury.
An insured school operates with calm diligence. Uninsured risks create silent pressure on instructors, who may push students to progress faster than prudent. Your journey into microlight lessons should rest on verified paperwork, not trust alone.
Student Reviews and Pass Rates
Pass rates are a reliable measure of a flight school’s integrity. Ask for recent examination statistics, not polished averages. An 80% first time pass rate reveals more than any testimonial wall. Student reviews, read with patience, expose the texture of daily instruction. Look for patterns across platforms. One complaint about an aircraft is noise. Five complaints about the same instructor are a signal.
Schools that publish transparent pass data tend to earn the most candid reviews. The two metrics usually align. When comparing microlight lessons, ask for this:
- Pass rates separated by dual and solo checkrides.
- Reviews from students who completed training, not those who merely started.
- The school’s pass rate compared with the national average.
Honest numbers indicate a school that respects your time and money.
Location and Weather Considerations
In South Africa, the airfield’s location is the first unspoken syllabus. A school in the Cape Peninsula fights relentless southeasterly winds. A Highveld field deals with afternoon thunderstorms and thin air. Both build character, but you will log more productive hours where conditions cooperate. Ask how many training days are lost monthly to wind or rain. That number is more honest than any brochure.
Consider what a specific field offers for microlight lessons:
- Runway orientation relative to prevailing wind.
- Proximity to controlled airspace and the delays that follow.
- Altitude above sea level and its effect on climb performance.
Weather dictates the rhythm of microlight lessons. Winter mornings in the Free State offer glassy air; by 11am, thermals rattle the wings. Schedule early sessions for calm landings. Confirm your instructor covers gusty crosswind technique during solo phases. A school that acknowledges density altitude in your training plan respects your progress.
Advanced Skills and Endorsements
Cross-Country Navigation and Radio Work
Cross-country flight is where your microlight lessons gain purpose. You plan a route, read the wind, and verify landmarks against the chart. Radio work requires precise language. In South Africa, controlled airspace and military zones demand clear calls. You learn to state your position, altitude, and intentions without hesitation.
A typical navigation exercise might include:
- Pre-flight weather and NOTAM briefing
- Plotting magnetic headings and ground speeds
- Radio handovers at each frequency boundary
Your instructor will observe your decisions, then review every deviation. The goal is autonomy. Compliance alone is insufficient. By the end, you navigate by reference to ground features and speak on the radio with calm efficiency.
Night Flying Endorsement
Night flying changes the microlight experience. The visual cues you relied on disappear, and your ears and instruments take over. In South Africa, a night flying endorsement requires extra training beyond the standard microlight lessons, usually five to ten hours depending on the school. You must prove you can handle circuits, diversions, and engine failure in darkness.
The training covers familiar tasks under unfamiliar conditions. You practise at your home airfield until the runway lights become routine, then move to quieter strips where there is no artificial horizon.
- Reading weather at night, when distant lightning and temperature changes are invisible
- Managing cockpit lighting and torch discipline
- Executing a controlled glide approach without visual reference to terrain
Your logbook entry must be signed by a grade II instructor or higher. The endorsement stays on your licence for life. After that, the night rating changes how you approach all microlight lessons, making you more deliberate about planning and checks.
Tailwheel and Mountain Training
A tailwheel endorsement makes you feel like a beginner again. The aircraft wants to ground loop the moment you lose focus, and you learn to use rudder with your whole body. That pressure sharpens your flying. It changes how you approach your standard microlight lessons, because every crosswind landing afterwards feels simple.
Mountain training takes you into the Drakensberg foothills or the Cape fold mountains. Altitude thins the air, density altitude stretches your takeoff roll, and valley winds behave unpredictably. You learn to plan escape routes and read cloud shadows. A typical course covers:
- Tailwheel ground handling and wheelbarrowing risks
- Mountain ridge crossings and forced landing selection
Transitioning to Other Light Aircraft
Your microlight lessons teach you finesse, but transitioning to other light aircraft rebuilds your sense of scale. A heavier airframe carries more energy, and energy management becomes the whole exercise. The controls feel less direct, the stall characteristics differ, and the cockpit layout changes your scan. You do not relearn to fly. You learn to fly again.
South African regulations value cross-crediting. Your microlight hours can count toward further endorsements, but only after completing differences training. That covers:
- Weight shift versus three-axis control responses
- Radio navigation and transponder operating procedures
- Constant speed propeller and flap management
Spending time in a new cockpit sharpens the instincts your earlier microlight lessons built. The transition humbles you first, and then it turns into quiet confidence.
by | Oct 1, 2026 | Blog
Ultra Hafif Hava Aracı Pilotajına Giriş
Mikrolight Nedir ve Diğer Hava Araçlarından Farkları
The South African Civil Aviation Authority registers over a thousand microlight aircraft, yet most people struggle to explain what separates them from conventional planes. A microlight is a small, single-seat or two-seat aircraft that relies on weight shift or aerodynamic control. Its design prioritises simplicity and a direct connection to the air.
The differences from other aircraft are practical and operational. Consider this:
– Weight: typically under 450 kilograms, which affects thrust and fuel efficiency.
– Speed: lower cruise speeds allow pilots to enjoy the landscape, but demand sharper awareness of weather.
– Control: many use weight shift, meaning the pilot’s body moves the wing, unlike ailerons on a Cessna.
These characteristics shape every training flight. That is why microlight eğitimi focuses on reading the sky, managing energy, and feeling the aircraft rather than merely following instruments.
Türkiye’de Mikrolight Uçuşunun Yasal Çerçevesi
Turkey treats microlight flight as a matter of national aviation discipline. The Directorate General of Civil Aviation, or SHGM, requires every pilot to move through a defined licensing path before operating an ultralight aircraft. That path includes ground school, dual instruction, solo hours, and a final examiner check. This is where microlight eğitimi takes on its formal shape.
The legal framework for Turkish airspace demands registration, airworthiness certification, and third-party insurance. Medical fitness must be renewed every two years. These are not suggestions; they are conditions.
- A minimum of twenty dual instruction hours.
- Ten solo hours with cross-country navigation.
- Written examination and an in-flight skill test.
For South African pilots, Turkey’s structure underscores why solid microlight eğitimi matters, regardless of where the runway sits.
Mikrolight Pilotu Olmak İçin Gereken Ön Koşullar
Before you sign up for microlight eğitimi, ask yourself if you can handle being smaller than most birds! The sky does not care about your schedule. A good start requires a clean bill from your own mind and body. You need basic English, since most training materials and radio comms are in English. For Turkish training, you might need a translator, but for South African readers, the standard is English.
Training schools in South Africa typically expect these prerequisites:
- Minimum age of 16 for solo flight, 18 for full license
- Ability to swim, because you might have to abandon the aircraft in an emergency
- At least 20/40 vision, correctable to 20/20
- A personality that accepts instruction without arguing with the instructor
That last item matters more than you think. Microlight eğitimi rewards people who treat mistakes as data, not personal failures. If you bring ego, the wind will humble you. So the real prerequisite is unshakeable curiosity paired with an unusual willingness to be corrected.
Mikrolight Pilotaj Eğitiminin Aşamaları
Teorik Yer Eğitimi: Temel Havacılık Bilgileri
The first theory lesson is where most students realise that flying is less about adrenaline and more about discipline. In South Africa, the ground school phase of microlight eğitimi establishes the fundamentals before any throttle is touched. This is not a formality; it is the structural spine of every safe flight.
Ground training covers several subjects that demand genuine attention:
- Air law and airspace classifications relevant to microlight operations
- Meteorology, especially South African weather patterns and wind behaviour
- Principles of flight and aircraft performance limitations
- Navigation techniques and radio telephony procedures
Students often underestimate how much intellectual work precedes physical handling. I watched my own instructor roll his eyes at yet another student who arrived unprepared. Yet within this theory lies the foundation for every decision made at altitude during microlight eğitimi. A solid command of basic aviation knowledge separates a pilot from a passenger with a stick.
Pratik Uçuş Eğitimi: İlk Uçuştan Solo Uçuşa
The transfer from classroom to cockpit begins the practical phase. The first dual flight of microlight eğitimi is an orientation session. The student follows the instructor’s inputs, feeling how the aircraft responds to each control movement. This lesson is about exposure rather than performance.
Subsequent lessons build on this foundation. Circuit training takes priority. Each circuit pattern involves several components:
- Takeoff and initial climb
- Crosswind and downwind legs
- Base turn and final approach
- Landing and go-around procedures
The instructor gradually reduces verbal guidance as confidence grows. Emergency procedures are practised alongside normal manoeuvres. I can still recall how quiet the cockpit felt on my first solo. Once the student demonstrates consistent competence, the instructor clears them for the solo flight. That flight is the point of transition in microlight eğitimi. The aircraft carries only one person, and every decision belongs to the student.
Simülatör Eğitiminin Rolü ve Önemi
Most students arrive expecting the first simulator session to feel trivial. They leave with sweaty palms. The recreation of a cockpit forces decisions to be made in seconds.
The primary value of the simulator is repetition. A pilot learning emergency procedures can repeat a loss of thrust scenario fifteen times in one afternoon. In the air, such a situation takes days to practice safely.
The simulator also conditions situational awareness. Students learn to scan instruments while managing the radio. Every phase of microlight eğitimi benefits from this mental framework. By the time a student approaches solo flight, the simulator has become a familiar workspace.
I have seen students freeze in a simulated failure, then unfreeze with coaching. On their next session, the response was automatic.
Gece Uçuşu ve Aletli Uçuş Eğitimleri
Night flight alters the entire character of piloting. The horizon dissolves, and visual references shrink to a dim instrument panel. For pilots progressing through microlight eğitimi, this phase demands a shift in trust.
Instrument flight training introduces structured scans and procedural discipline. The stages follow a logical sequence:
- Twilight dual instruction to adapt to fading light
- Full darkness circuits with instructor oversight
- Instrument-only flight under a hood or in simulated cloud
Each step builds familiarity with disorientation. In South Africa, the Karoo’s dry air offers exceptional night visibility, which makes it a popular region for this phase of training.
The student learns that the inner ear lies. The instruments do not. In my own training, this was the moment the sky felt foreign again, and that discomfort became the foundation of safe night operations.
Eğitim Sonu Sınav ve Değerlendirme Süreci
The end of microlight eğitimi arrives not with ceremony but with scrutiny. The final examination splits into two parts, and neither offers comfort.
First, the written theory paper. Questions on air law, meteorology, and human performance surface from the quieter corners of the syllabus. Then the flight test. An examiner observes every control input, every glance at the instruments.
The evaluation covers:
– Pre-flight inspection and documentation
– Steep turns and stall recovery
– Forced landing procedures without power
– Navigation to a remote field and back
South African examiners are known for their exacting standards. They watch for hesitation as much as error. A student who second-guesses a decision in the air may pass the manoeuvres yet fail the assessment. The licence arrives only when the examiner signs the certificate, and that signature marks the end of the entire microlight eğitimi journey.
Eğitim Sürecinde Kazanılan Yetkinlikler
Meteoroloji ve Rüzgar Analizi Becerileri
You cannot reason with a southeasterly gust. That lesson lands with force during the practical phase of microlight eğitimi. Before any solo flight, you must interpret cloud formation and pressure trends correctly. South African Highveld summers create cumulonimbus towers by midday that turn into violent storms by afternoon. Your instructor guides you through tracking pressure changes and cloud evolution.
Wind analysis becomes a daily ritual.
– Check ATIS broadcasts for wind direction and speed
– Observe smoke drift near the hangar for ground-level wind
– Calculate crosswind components against runway heading
These habits separate grounded pilots from airborne ones. You begin to understand thermals, convergence zones and katabatic flows that behave differently over the Magaliesberg than over the coast. Meteorology in microlight eğitimi is not abstract theory. It is practical safety planning.
Acil Durum Prosedürleri ve Güvenli İniş Teknikleri
Every pilot eventually faces a moment when the engine note changes and the silence that follows demands an immediate response. In microlight eğitimi, that silence is rehearsed long before it happens naturally. Instructors simulate engine failures at altitude, forcing you to pick a field and commit to a glide approach. The competency lies in consistent decision making under pressure, not in executing a flawless approach.
Forced landing drills repeat until your field selection becomes instinctive. You learn to read wind direction from shadows and smoke, then plan a pattern that keeps the runway or paddock within reach. A structured emergency checklist becomes part of your flow:
- Maintain airspeed and pick a usable landing area
- Troubleshoot the engine only if altitude permits
- Configure the aircraft for a controlled touchdown
These rehearsals build a calm that carries into every flight after certification.
Hava Trafik Kuralları ve Seyrüsefer Bilgisi
The airspace over South Africa demands a particular kind of awareness. During microlight eğitimi, you learn to read controlled zones, restricted areas, and the invisible boundaries that define where you can fly. This knowledge is not academic. You apply it every time you pick up the radio and announce your position.
Navigation follows a similar curve. Early flights rely on visual pilotage, recognising landmarks and following roads. Later, you integrate compass headings, GPS waypoints, and wind correction angles into the same mental picture. This progression sits at the core of microlight eğitimi.
The training covers:
- Airspace classifications and their operational rules
- Standard radio phraseology for different flight situations
- Cross-country flight planning with fuel and terrain considerations
By certification, these competencies feel natural. That is the goal. Air traffic rules keep you predictable to others, and navigation knowledge keeps you oriented in a three dimensional world. Both become part of your thinking, not separate tasks.
Bakım ve Kontrol Öncesi Uçuş Öncesi Muayene
During microlight eğitimi, you develop a precise awareness of your aircraft’s physical state. The pre-flight inspection is not a formality. It is your final chance to catch a problem before it becomes critical. Fuel lines, control cables, and wing attachments demand your full attention before every departure.
A thorough inspection becomes automatic after you practice it repeatedly. You learn to look for fuel leaks, loose fasteners, worn tires, and corrosion. Each checklist item reinforces a habit that protects you and your passenger.
Typical checks include:
- Control surface movement and locking pins
- Fuel quantity and oil levels
- Propeller condition and mounting bolt torque
- Frame welds and fabric tension
This competency reduces risk before takeoff. The confidence you gain from proper maintenance allows you to focus on flying, not on worrying.
Sertifika, Lisans ve Kariyer Olanakları
Ulusal ve Uluslararası Geçerli Lisans Türleri
Completing microlight eğitimi changes more than your skill set; it transforms your identity. The license you earn grants access to airspace that remains closed to others. In South Africa, the South African Civil Aviation Authority issues a microlight pilot license recognized locally, but the journey does not end there.
International validity depends on bilateral agreements and the type of license. For example, a South African microlight license may be converted or validated in countries like the United Kingdom or Australia, subject to their specific requirements. This enables cross-border flying and professional opportunities.
- National license: valid only within South Africa, requires renewal and medical fitness.
- International license: obtained through validation or conversion, often requires additional flight hours or exams.
Career paths after microlight eğitimi include flight instruction, aerial photography, or agricultural spotting. Each role demands a deeper understanding of the aircraft and yourself. The license carries responsibility that follows you into every flight.
Sertifika Almak İçin Gereken Uçuş Saati ve Şartlar
Completing microlight eğitimi in South Africa demands more than logging hours. The South African Civil Aviation Authority requires a minimum of 25 flight hours, with at least 15 hours of dual instruction and 10 hours of supervised solo time. That solo time is where you discover your own judgment.
Before the certificate is issued, you must clear a written knowledge test and a practical flight examination. Medical fitness forms the backbone of the process, and you must be at least 16 years old. Schools also ask for a valid radio telephony license before your first solo.
- Minimum age: 16 years
- Medical certificate: Class 4 or higher
- Written exam: pass required before flight test
Once those requirements are met, the certificate carries weight beyond the logbook. It proves you survived the demanding pace of microlight eğitimi and earned the trust of your instructor. That trust translates into every flight you take afterward.
Mikrolight Eğitmeni Olma Yolunda İlerleme
Your microlight certificate marks the moment you become a licensed pilot, yet the deeper lessons of microlight eğitimi continue well beyond that day. For many pilots in South Africa, the next step is teaching others to fly. Progression toward becoming a microlight instructor requires additional ratings. The instructor rating demands a separate examination and a demonstrated ability to explain complex maneuvers clearly.
Licensing pathways branch into advanced endorsements. Some pilots pursue tailwheel conversions. Others add cross-country endorsements for longer expeditions. The career options extend beyond instruction:
- Flight school operations and dispatch
- Aerial survey support roles
- Safety and compliance coordination
Each role builds on the discipline forged during microlight eğitimi. The instructor rating remains the most rewarding step. You shift from student to mentor, and your judgment keeps someone else safe during their first solo. That responsibility changes how you see flying, and it stays with you long after the lesson ends!
Ticari Uçuş ve Hava Taksi İmkanları
Your microlight training does not end with a private licence. In South Africa, the next step is commercial application. A microlight certificate allows aerial work that heavier aircraft cannot perform economically.
Commercial microlight operations include air taxi services, where pilots ferry passengers or cargo over short distances. The Civil Aviation Authority recognises microlight licences for specific commercial purposes, provided you meet the hour requirements and pass the relevant competency exams. I have seen pilots move from weekend flying to paid air taxi work within a year.
Career pathways worth considering:
- Air taxi pilot for remote lodges and farms
- Aerial survey and photography support
- Flight school assistant and dispatch roles
Each of these roles demands the discipline built during microlight eğitimi. The licence is your starting point, but the career depends on continued proficiency and local knowledge.
Havacılık Kulüpleri ve Topluluklara Katılım
Earning your microlight eğitimi certificate opens doors, but the real magic happens when you join a flying club. I have watched pilots gain confidence through weekend fly-ins and shared maintenance sessions. Clubs offer access to experienced mentors who explain local weather patterns and airspace quirks. They also connect you to career opportunities: aerial survey companies often recruit from club rosters. Here is what membership typically provides:
- Regular safety briefings
- Discounted aircraft rental rates
- Networking with commercial operators
Your licence becomes more valuable when your community knows your skills. In South Africa, clubs like those around the Karoo host cross-country navigational exercises that sharpen your decision making. Joining a chapter is not an extra step; it is the pulse of your microlight eğitimi journey. Show up, log hours, and let the community lift your ambitions.
Sürekli Eğitim ve Yenileme Gereksinimleri
One of the quietest satisfactions in aviation is hearing your own voice on the radio for the first time. Then comes the certificate. The microlight eğitimi process does not end with a single successful flight. It evolves into a cycle of renewal and proof. South African pilots discover that their licence is a living document, not a static prize.
Your microlight eğitimi certificate opens contract work, aerial photography gigs, and even game count surveys across the Karoo. But every two years, you face a flight review. This is not a formality. It is a sharp, practical check of your habits and instincts. I have seen pilots fail because they forgot to check the fuel cap.
Renewal also demands a medical fitness declaration. Instructors watch for drift, hesitation, or overconfidence. Maintaining proficiency requires a mix of study and stick time:
– Annual refresher on air law changes
– Three takeoffs and landings with an examiner
– A written test on weather phenomena
That certificate begins to beat like a pulse, reminding you that skill is a practice. Recurrent microlight eğitimi keeps your judgement honest and your logbook alive. The sky asks for attention, and renewal is how you prove you still listen.
Eğitim Seçerken Dikkat Edilmesi Gerekenler
Eğitim Kurumu Seçiminde Akreditasyon ve Referanslar
Choosing where to complete your microlight eğitimi demands more than a quick glance at a school’s website. Accreditation sets the baseline for safety and curriculum, while references reveal how the training actually unfolds in practice. South African students should confirm that a school holds valid approval from the relevant aviation authority, but that alone does not guarantee quality.
Look for these signs when comparing institutions:
- Transparent documentation of instructor qualifications and aircraft airworthiness
- Former students who can describe their solo flight experiences in specific detail
- A safety record that includes both past incidents and corrective actions taken
References and accreditation work together. A school with proper oversight and a community of credible graduates offers the most reliable foundation for your microlight eğitimi. Talk to current trainees before you decide.
Eğitim Ücretleri ve Paket İçeriklerinin Karşılaştırılması
The cost of microlight eğitimi varies more than most prospective pilots anticipate. Hourly rates advertised by South African flight schools often exclude critical line items like landing fees, examiner charges, and aircraft insurance levies. A package that appears affordable on paper can accumulate hidden costs by the time you complete your first solo circuit.
Some schools bundle ground school materials, headsets, and examination fees into their quoted price. Others present a bare figure and add every ancillary expense later. I have watched students discover these extras mid-training, when switching schools becomes impractical.
You might also compare:
- Aircraft type and hourly tach time versus Hobbs time billing
- Instructor availability beyond scheduled blocks
- Simulator sessions and whether they count toward your syllabus
The cheapest microlight eğitimi rarely delivers the fastest path to licensure, and the most expensive does not guarantee superior instruction.
Uçuş Okulunun Filo Durumu ve Bakım Standartları
At a South African flight school, the condition of the fleet often tells a more honest story than any brochure. Walk the hangar before committing to microlight eğitimi. Look for aircraft with clean logbooks and visible inspection stickers. Corrosion around wing struts or oil residue beneath the engine mount warrants direct questions.
Consider how the school manages daily inspections and airframe hours. Older trikes can still be fully airworthy when maintained with discipline.
- Check whether maintenance is completed in-house or outsourced to an approved facility
- Ask about average fleet age and the replacement schedule for high-wear components
- Review the last three maintenance entries for the specific aircraft you would fly
A school that cannot produce these records on demand may not deserve your training hours.
Sigorta ve Sorumluluk Konularında Bilinçlenme
When you choose microlight eğitimi, the policy details matter more than the premium. In South Africa, flight schools vary widely in how they handle insurance and liability. Some expect students to carry personal accident cover; others include hull and third-party in the package. Ask for a written summary of what is covered before you pay a deposit. That document reveals whether you are protected during dual instruction and solo sorties.
Liability also extends to your actions on the airfield. Damage to a hangar or a parked aircraft can become your responsibility if the school’s policy excludes student pilots. Verify if the school’s insurance covers your training hours specifically, not just the aircraft. A quick phone call to the insurer can save you from a costly surprise.
- Request the certificate of currency
- Ask about excess amounts for any claim
- Confirm whether your medical costs are included
You are not being paranoid. You are being pragmatic.
by | Sep 24, 2026 | Blog
Defining Microlight Aircraft Beyond the Basics
What Is a Microlight Aircraft?
Just over 1,200 microlight aircraft are registered in South Africa, a number that surprises newcomers to the skies. That statistic anchors any serious conversation about these flying machines, which go beyond simple weight classes. The category is shaped by regulatory nuance and practical performance.
What truly defines a microlight? The answer lies in several measurable traits:
- An empty weight below 155 kilograms for single-seaters, or 175 for two-seaters
- A stall speed not exceeding 65 kilometers per hour
- A maximum of two seats, with fixed or flex-wing configuration
These figures refine the microlight aircraft definition for pilots and engineers alike. They explain why these machines feel responsive yet forgiving, and why they remain a gateway to authentic flight without the burden of heavy certification.
Microlight vs. Ultralight: Terminology Differences
The microlight aircraft definition behaves differently depending on which rulebook you open. South Africa calls it a regulated category under Part 105, with empty weight and stall speed limits that give the machine its character. America calls the same machine an “ultralight,” a term that implies a lighter footprint but actually refers to a different set of numbers.
Here is where the terminology splits:
- Microlight: the South African legal label for one or two seat aircraft with defined weight and stall characteristics.
- Ultralight: a North American label, usually for a single seat aircraft with an even lower stall speed.
The two words get swapped freely, which makes hangar conversations a spectator sport. Ask a pilot what he flies and you will hear a brand. Ask a regulator and you will hear a paragraph number. That split sits at the core of the microlight aircraft definition, and it never quite resolves itself.
Common Misconceptions About Microlights
Ask an engineer to define a microlight and she will cite stall speeds. Ask a pilot and he will describe a machine that fits around you like a well worn jacket. The microlight aircraft definition often hides the practical realities of flying one. A common misconception is that these aircraft are safer because they are slower. Slower does not mean forgiving. The aircraft demand precise control input, especially in turbulent coastal conditions around Cape Town. Weight shifts during passenger entry change stall behavior more noticeably than in larger machines.
Misconceptions persist in hangar talk:
- Microlights cannot fly cross country. False, they routinely cover 300 nautical mile legs.
- They require no formal training. False, South Africa enforces a structured license.
- Heavier pilots are excluded. False, but weight and balance calculations rule every flight.
Another assumption is that a microlight is simply a small aeroplane. The microlight aircraft definition includes operational limits that change how you plan every trip. Fuel reserves, weather minima, and payload tolerances are stricter than many pilots expect. The real challenge is not flying the machine, it is respecting its narrow envelope.
Anatomy and Key Characteristics
Airframe and Construction Materials
Take a look at any microlight’s skeleton and you will see a pragmatic arrangement of tubes. Most airframes rely on 6061-T6 aluminium, a material that balances strength with easy repair, which matters when you land on a Karoo farm. Some designs add chromoly steel for the critical stress areas, like the wing strut attachments, where a little extra weight buys safety.
Covering materials are just as deliberate. Polyester fabric tolerates UV exposure, while Dacron shrinks tightly over the frame for a smooth profile. Wing spars might use sitka spruce for elasticity or carbon fibre for stiffness, depending on the builder’s priorities. Consider this typical construction list:
- Aluminium for the main longerons
- Steel for the undercarriage brackets
- Composites for the nose cowl
The microlight aircraft definition packs these choices into a maximum takeoff weight of 450 kg, forcing every gram to serve a purpose. That constraint keeps the flying honest and the maintenance schedule short.
Wing Configurations: Fixed-Wing, Flex-Wing, and Weight-Shift
The wing is the primary factor in the microlight aircraft definition. Fixed-wing designs use rigid structures and ailerons, offering the most conventional control feel. Pilots bank and pitch using traditional sticks and rudder pedals.
Flex-wing and weight-shift designs remove the control surfaces entirely. These aircraft hang a fabric sail above a frame, and the pilot steers by shifting body weight. This approach simplifies the mechanical load, but it demands a sharper awareness of wind conditions.
The list below breaks down how each wing type fits into the microlight aircraft definition, yet these categories often intersect.
- Fixed-wing: Provides predictable, conventional flight characteristics.
- Weight-shift: Relies on the pilot’s body weight for directional changes.
- Flex-wing: Prioritizes portability and reduces the number of moving parts.
Powerplants: Engines and Propulsion Systems
Few components shape the microlight aircraft definition as forcefully as the powerplant. A typical two-stroke engine in this class produces roughly 80 horsepower from a block you can lift with one arm. That power-to-weight ratio separates microlights from heavier recreational aircraft.
The propulsion choices break into two main families:
- Two-stroke engines: Light, simple, and inexpensive, but they require careful thermal management.
- Four-stroke engines: Heavier and smoother, with better fuel economy.
Electric propulsion is appearing at South African airfields, though range remains limited. Propeller design matters equally. Most microlights use a fixed-pitch wooden or composite prop. Some pilots choose ground-adjustable blades to fine-tune climb performance against cruise speed.
Every gram of engine weight shifts the aircraft’s centre of gravity. That is why pusher configurations dominate the market. The mass sits behind the pilot, keeping the nose light. And honestly, you will rarely find a cleaner expression of the microlight aircraft definition than a well-balanced pusher layout.
Avionics and Flight Controls
Your cellphone packs more computing power than the entire avionics suite in most microlights. That is not criticism. The panel shows airspeed, altitude, engine temperature, and a compass. Enough data to fly, not enough to distract. This restraint sits at the core of the microlight aircraft definition.
Flight controls stay equally blunt. Weight-shift machines use a bar and your own body for pitch and roll. Fixed-wing types offer a stick and rudder pedals. No fly-by-wire, no servo assists, just direct links.
- Handheld radio for talking to towers
- Small GPS unit as a map backup
- Transponder only in busy airspace
You push, the aircraft moves. That feed of pressure and response keeps flying skills sharp.
Safety Features and Emergency Systems
The anatomy of a microlight is honest. Tubes and cables do exactly what they appear to do. No hydraulic fluid, no pressurised systems. The airframe flexes in turbulence, and that flex is not a flaw. Weight matters. A machine that weighs less survives a hard landing better than one that carries excess mass. These physical limits are part of the microlight aircraft definition.
Safety arrives through restraint. A ballistic recovery parachute rides behind the pilot, waiting for the day it never hopes to meet. Emergency landings are rehearsed on the ground before they are needed in the air. You are the system. That reality is embedded in the microlight aircraft definition.
- Ballistic recovery parachute
- Four point harness
- Rollover protection structure
These elements do not advertise themselves. They sit silent and ready, checked by habit before every departure.
Payload and Range Capabilities
Payload and range define what a microlight can actually do for you. In South Africa, where airfields sit hours apart, those numbers matter. Most two seat microlights carry a useful load of around 200 kilograms. That includes fuel, baggage, and both occupants. Range follows the same logic. With a standard tank, expect three to four hours of flight time. Enough for a morning hop from Johannesburg to the Magaliesberg and back.
The anatomy of these machines rewards restraint. Every component earns its place by weight. That is the core of the microlight aircraft definition. You feel the trade offs on every climb:
– Wing loading
– Propeller pitch
– Fuel quantity
Each choice shifts the others. Add full fuel and you lose climb rate. Reduce baggage and you gain a safety margin. It is a continuous calculation, not a fixed specification. The payload you carry changes the aircraft beneath you. That is the honest physics of ultralight aviation.
Regulatory Framework and Certification
National Aviation Authority Classifications
The official microlight aircraft definition in South Africa is not a casual label. It is codified by the South African Civil Aviation Authority. This authority sets the limits that separate microlights from general aviation aircraft, and those limits affect every pilot who wants to fly one.
The certification process is where the definition becomes real. You cannot simply call any small plane a microlight. The regulator requires specific categories, and each one carries its own set of rules. Here is a practical breakdown!
- Fixed-wing microlights, with a maximum take-off weight of 450 kilograms.
- Weight-shift microlights, also capped at 450 kilograms.
- Powered parachutes, which have a distinct certification path.
Each class demands a specific pilot rating. I have seen pilots assume a microlight rating transfers across categories, but it does not. The authority inspects your aircraft to confirm it meets structural and safety standards. That is what certification truly means.
Pilot Licensing Requirements
The regulatory framework does not stop at aircraft certification. It reaches directly into the cockpit. Every pilot must hold a licence that matches the specific microlight class they intend to fly. The microlight aircraft definition in this context becomes a legal instrument, not merely a technical description.
Pilot licensing under the SACAA requires:
- A minimum age of 17 years
- A valid aviation medical certificate
- Dual and solo flight training hours
- Written examinations on air law and meteorology
- A practical flight test with a designated examiner
Every element of this process ties back to the microlight aircraft definition. I have seen pilots assume their existing licence covers every microlight category. It does not. The regulator uses that definition to decide which training syllabus applies and which examiner endorsement carries legal weight. Certification and licensing work together as a single system.
Aircraft Registration and Airworthiness Standards
The microlight aircraft definition in South Africa carries legal weight beyond simple classification. It determines which registration lane your aircraft enters. The SACAA maintains a national register that every microlight must join before flight. That register requires:
- Proof of ownership with a traceable chain of custody
- A unique registration mark assigned by the CAA
- Confirmation that the aircraft matches its type certificate or exemption
Airworthiness standards run parallel to registration. The microlight aircraft definition decides which certification basis applies to each machine. Some microlights qualify for a standard certificate of airworthiness, while others fall under the non type certificated category. That distinction changes maintenance schedules, inspection intervals, and repair facility authorisations.
Registration proves an aircraft exists on paper. Airworthiness proves it is sound in practice.
Operating Restrictions and Airspace Rules
The microlight aircraft definition in South Africa extends into the sky itself. Operating restrictions attach to the classification, not the pilot’s ambition. A machine certified as a non type certificated microlight may face altitude caps that type certificated aircraft avoid entirely.
Airspace rules compound those limits. Most microlights fly under visual flight rules, so cloud cover and visibility dictate when the engine may turn over. Controlled airspace demands a clearance, and certain restricted zones forbid entry at any time.
The classification determines:
– Maximum operating altitudes
– Minimum distance from built-up areas
– Permission to cross international borders
– Eligibility for night operations
Every one of these limits traces back to the microlight aircraft definition. That definition draws the legal boundary of your flight envelope.
Differences Between Microlights and Light Sport Aircraft
In South Africa, the distinction between a microlight and a Light Sport Aircraft often confuses new pilots. The microlight aircraft definition hinges on the certification path chosen by the manufacturer. A microlight may be issued as a non type certificated aircraft, which places the burden of proof on the builder or owner. Light Sport Aircraft, by contrast, follow a consensus standard that dictates specific design and performance parameters.
The regulatory framework treats these machines differently, even when they share similar dimensions. A microlight requires a CAA approval process that often involves a different set of maintenance schedules. Light Sport Aircraft enjoy a more streamlined administrative route, but they face their own restrictions.
Certification differences come down to three core elements:
1. The applicable design standard
2. The required inspection intervals
3. The authorised repair personnel
These factors determine whether the aircraft type is certified for aerobatic flight or limited to basic manoeuvres. The microlight aircraft definition matters most when you sell the machine or travel across provincial borders. Buyers should verify the exact certificate type before committing to a purchase. The paperwork defines your machine’s legal identity as clearly as its wingspan.
Why Fly Microlight Aircraft?
Cost-Effectiveness and Accessibility
Flying a microlight in South Africa opens a door that many assume stays shut for ordinary people. The real cost of ownership, when you include fuel, hangarage, and maintenance, often lands far below what a light aircraft demands. That is what makes the microlight aircraft definition so appealing: it captures machines designed for efficiency, not excess. I have watched first-time pilots grin after their first solo.
Accessibility also hinges on the pilot community. Clubs across the country welcome newcomers with affordable instruction and shared airfields. You can start with a simple two-seater and build hours without draining savings. The barrier is lower than most imagine!
- Lower initial purchase price
- Reduced fuel burn per hour
- Minimal storage space required
This combination lets more South Africans experience flight as a regular habit, not a rare luxury.
Fuel Efficiency and Environmental Impact
A microlight burns less fuel in an hour than a typical SUV does idling in traffic. That efficiency sits at the centre of the microlight aircraft definition. For South African pilots, this translates directly into longer flights and reduced noise.
The environmental benefits follow directly. Lower consumption reduces emissions and noise, making microlights a considerate neighbour to both nature and communities. Many modern engines run on unleaded fuel, and two stroke options have become noticeably cleaner.
Consider what this adds up to!
- Fewer litres burned per flying hour
- Smaller carbon footprint per flight
- Quieter operations at local airfields
These are practical advantages. The definition of a microlight aircraft emphasises efficiency, and that efficiency is beneficial to the environment.
The Freedom of Recreational Flying
The freedom of recreational flying becomes real at the moment of lift-off. The ground falls away, and the microlight answers every subtle input. The microlight aircraft definition often focuses on physical dimensions, but pilots know it better as an experience. In South Africa, that experience includes:
- Uncluttered views over bushveld and vineyards
- The ability to land where few other aircraft can
- A direct connection between your hands and the sky
Your view is unobstructed, your speed is your own. You can follow a river, circle a koppie, or climb above a passing storm. This is not escapism, it is presence.
Community and Training Opportunities
The average microlight pilot has more friends in the hangar than on social media. That is not a statistic, but it should be. Community is the quiet backbone of this sport, especially in South Africa where airfields double as meeting spots. The microlight aircraft definition lists dimensions and weights, yet it omits the Sunday morning crowd debating carburettor jets over coffee.
Training opportunities range from structured courses to casual coaching by veterans. Many schools offer trial lessons, and clubs happily absorb newcomers. Some of the best instruction happens informally.
- Structured grade courses
- Peer mentoring programmes
- Annual safety workshops
You will find that the microlight aircraft definition becomes less relevant once you realise how much the community shapes your learning curve. Every student pilot inherits decades of collective experience, often shared with generous doses of humour.
Performance Capabilities and Limitations
The microlight aircraft definition promises performance, but the reality depends on the pilot. A typical two-stroke machine cruises at 100 kilometres per hour. That is enough to cover enormous distances across the Karoo or the Lowveld. Climb rates, usually around 300 feet per minute at sea level, demand planning. You read the terrain, the wind, and the engine temperature continuously.
The same characteristics that make microlights responsive also limit them. Gusts, crosswinds, and afternoon heat reduce margins. Most European machines carry restrictive weather limits, but South African pilots know the bushveld generates its own turbulence. Every field is viable, yet every landing is calculated.
Range and payload bound the adventure. Two occupants, minimal luggage, and about four hours. The microlight aircraft definition quantifies these limits. It cannot describe the satisfaction of flying within them.
The Evolution and Future of Microlight Aviation
Historical Development from Hang Gliders
The microlight aircraft definition owes its existence to the hang glider pilots of the 1970s. These pioneers strapped themselves to fabric wings and launched from coastal dunes. Those early flights were pure instinct! The machines had no wheels, no instruments, and no margin for error. Pilots simply ran, lifted, and trusted the wind.
By the late 1970s, inventors attached small two-stroke engines to these gliders, creating the first true microlights. The transition was awkward. Pilots had to manage thrust while maintaining weight shift control. Within a decade, manufacturers refined the design into reliable, foldable aircraft that could be trailered home.
The future points toward electric powertrains and composite airframes. Modern microlights already incorporate GPS navigation and ballistic parachutes. The next generation will likely feature hybrid propulsion and advanced stall prevention systems. The microlight aircraft definition continues to expand as technology reshapes what these light machines can achieve.
Technological Innovations in Materials and Engines
What once seemed fixed in the microlight aircraft definition now shifts with every new alloy and lithium cell. The 1980s relied on simple welded steel and dacron. Today, carbon-fibre spars and glass-reinforced composites slice weight while adding stiffness. Engines evolved in tandem; the familiar two-stroke gives way to fuel-injected four-strokes and liquid-cooled rotax units that burn cleaner and run quieter.
South African manufacturers are testing titanium valve trains and ceramic-coated pistons to withstand high heat. The next leap involves hybrid powertrains. Lightweight electric motors paired with small range-extenders could allow pilots to climb silently over the Highveld. Research into battery energy density continues, and prototype solar skins may soon supplement charge. These innovations expand performance and the microlight aircraft definition itself, blurring the line between ultralight recreation and genuine commuter travel.
Electric Microlights and Sustainability Trends
Electric propulsion is rewriting the microlight aircraft definition once more. The drone of a two-stroke engine, once common at South African airfields, is giving way to the whine of electric motors. I have watched a handful of local pilots fly short hops on battery power alone.
The gains are tangible:
- Lower operating costs per flight hour
- Reduced noise near residential airstrips
- Simpler maintenance with fewer moving parts
Sustainability trends push manufacturers toward recyclable airframes and biodegradable composites. Solar charging rigs at rural airstrips are becoming less of a novelty. Lithium sulphur cells in prototype phase could double energy density within a decade.
The practical impact on the microlight aircraft definition is simple. Aircraft become quieter, cleaner, and cheaper to operate. That changes who can fly and where they can fly. The definition expands to include a new kind of machine, one that leaves less noise and pollution in the areas it crosses.
The Growing Popularity of Microaviation
Microlight aviation in South Africa is shifting from a niche pursuit to a familiar sight above the Highveld. The microlight aircraft definition once conjured images of fragile frames and daring pilots. Today it describes a practical, accessible way to fly for recreation and sport.
Flight schools report waiting lists. Private airstrips are adding hangars. This growth follows a broader trend, as people seek relief from congested cities and crowded schedules.
- More training programmes across all nine provinces
- A healthy second hand market for well maintained aircraft
- Youth flying clubs gaining traction at school level
The future points toward deeper integration with general aviation. As the microlight aircraft definition evolves, it captures machines that are safer, more efficient, and more popular than ever before.
Career Paths and Professional Uses
According to the South African Civil Aviation Authority, microlight flight hours have grown by 18% since 2020. That growth is driving a new question: what can these aircraft do beyond Sunday joyrides? The microlight aircraft definition now includes machines used for game counting, pipeline patrol, and even crime scene photography.
Career paths are emerging:
- Game reserve anti-poaching patrols
- Aerial crop health assessments
- Power line inspections
Pilots with a microlight licence often start these roles after 100 hours of experience. The future will likely see deeper integration with commercial operations.

by | Sep 23, 2026 | Blog
The Ultimate Bird’s Eye View
Why a Flight Over the Falls Is a Bucket-List Adventure
A flight over the gorge in a microlight aircraft victoria falls offers a perspective that changes how you understand water itself. From the air, the falls become a seismic event you can see. The spray column rises like a weather system of its own, visible from the runway before you even lift off.
The sensation is intimate. You feel each thermal push against the frame, the cool river air mixing with the heat of the gorges. On a quiet morning, with the engines throttled back over the eastern cataracts, the noise of the water is louder than any machine.
I found myself watching the rainbows form below my feet, shifting as the wing tilted. From this height, you count the elephants that trace their slow paths along the riverbanks. The scale reveals itself only in the air, where the river bends and the gorge deepens in one sweep.
The Sensation of Soaring Like a Bird
Every control input passes through your skeleton before the wing responds. That is the difference between a machine you sit in and a machine you control from your core. A microlight aircraft victoria falls flight puts your balance directly into the wing, and the aircraft answers every lean.
The first minute is loud, and the noise comes from your own senses. Your ears measure altitude before your eyes accept it. Your chest feels each pressure wave from the gorge before you see its cause. You lean, and the horizon tilts a heartbeat later.
A few things happen in that opening minute:
- The harness becomes a second set of joints.
- Gravity shifts from a concept to a constant pressure in your ribs.
- Your hands learn the wing’s lag and correct it automatically.
That is the bird’s seat. A microlight aircraft victoria falls ride puts the controls where your instincts already live.
Combining Your Flight with Other Victoria Falls Activities
Thirty minutes after landing from your microlight aircraft victoria falls flight, you can be on the water, staring up at the same gorge from below. The aerial view lays out the entire falls in one sweep. A river cruise at the base passes through the spray and current. I have done both in a single morning, and the two perspectives still merge in my mind!
Other travellers pair the flight with a walk through the rainforest, where the thunder replaces the engine hum. Some add afternoon tea at the old hotel, watching the mist from the lawn. The order matters less than the contrast.
- The flight gives the scale.
- The ground activities give the texture.
- Together they build a full image of the Zambezi.
Each outing feeds the next. Once you hold the aerial view, every footstep on the ground becomes part of the same map.
Choosing Your Flight Experience
Standard Flights vs. Extended Tours
The standard flight holds a fixed line over the gorge, a single pass that measures the falls from where the spray first lifts to where it thins against the cliffs. Extended tours carve deeper upstream, following the Zambezi’s unpredictable bends. I have taken both routes, and the difference lies in what you are willing to trade: twenty minutes against an hour, a single vision against a slow accumulation of detail. A microlight aircraft victoria falls journey rewards those who linger.
The route shapes everything:
- Standard flights circle the main cascade, tight and efficient, perfect for a first taste.
- Extended tours gain altitude above the Batoka Gorge, stretching sightlines beyond the falls.
- The longer path also reaches quieter upstream waters where the river narrows and the bush thickens.
The Aircraft Models Used for Scenic Flights
Chooseing your flight experience hinges on more than the route. The aircraft itself shapes what you see and how you feel it. Operators across Victoria Falls maintain fleets of trikes and fixed-wing microlights, each with distinct handling characteristics that alter the journey over the gorge. The trike, with its exposed cockpit and hang-glider wing, offers an unfiltered connection to the air. You feel every thermal and crosswind as the machine banks over the spray. The fixed-wing microlight, by contrast, provides a more stable platform, useful for photographers who need a steady frame.
The common denominator is the Rotax engine, a workhorse known for reliability in the heat. Most scenic flights use either the two-seat trike or the weight-shift control model, which requires a different piloting skill than a conventional yoke. This matters to you only in terms of comfort.
– Trikes offer unobstructed views with no canopy frame in the way.
– Fixed-wing models reduce wind chill and allow for easier camera handling.
– Enclosed cabins suit cooler mornings, while open cockpits suit the midday sun.
One operator runs the Air Creation Tanarg, a trike that climbs at a rate that catches first-time passengers off guard. Another uses the Savannah, a light aircraft with a high wing that keeps the horizon visible. The choice between them is not about superiority, but about preference for exposure versus enclosure. A microlight aircraft victoria falls flight on a trike demands a tolerance for wind noise, while the Savannah gives a quieter ride. Both deliver the same landscape, but the sensation differs. Book what fits your nerve, not what fits the brochure.
What to Expect During the Flight
Your microlight aircraft victoria falls flight starts long before the engine turns over. The pre-flight routine is methodical. You are weighed, strapped into a five-point harness, and briefed on hand signals. Nothing is left to assumption.
Takeoff is the part most passengers underestimate. The roll is short, and the nose pitches up sharply. Within seconds, the ground drops away. The pilot trims the wing, and the vibrations settle into a rhythm you can anticipate. The spray from the falls appears as a shimmer on the horizon, and the air cools noticeably.
A standard flight runs about thirty minutes. The pilot maintains altitude along the gorge rim, giving you time to absorb the scale. Most passengers go quiet at this point. The engine note of a microlight aircraft victoria falls flight is persistent, but not so loud that it drowns thought.
- Keep cameras secured with a wrist strap at all times.
- Wear sunglasses; the glare off the water is intense.
- Do not attempt to unfasten your harness mid-flight.
Differences Between Trike and Gyrocopter Options
Choosing between a trike and a gyrocopter for your microlight aircraft victoria falls adventure comes down to how you want to feel in the air. A trike places you in the open, with the wing above and the wind at your chest. You bank with your body as much as the frame. A gyrocopter encloses you more, with a rotor spinning overhead and a cockpit that feels closer to a small car with a view.
- Trike flights offer a slower, more exposed ride over the gorge.
- Gyrocopters provide a stable platform for photography and a faster transit to the falls.
Each option changes the sound profile and the sensation of altitude. For many first timers, the trike’s simplicity wins. For those who want a quieter, more controlled perspective, the gyrocopter delivers. Either way, your microlight aircraft victoria falls flight will be defined by this choice.
Safety and Preparation
Safety Regulations and Maintenance Standards
Flying a microlight aircraft victoria falls demands more than courage; it demands rigorous compliance. Operators subject every trike and gyrocopter to South African Civil Aviation Authority standards, with maintenance schedules that leave nothing to chance. Engines are load-tested, airframes inspected for stress fractures, and logbooks audited with forensic precision.
Before each departure, pilots perform a detailed pre-flight ritual. Control surfaces, fuel lines, and harness buckles receive individual attention, while wind speeds and visibility are re-evaluated against strict thresholds. The ground crew communicates openly about every variable.
- Daily visual inspections of rotors and wiring
- 100 hour engine services and oil analysis
- Annual airworthiness renewals with documented histories
These protocols underpin the entire microlight aircraft victoria falls operation. As a passenger, you are briefed on boarding procedures and emergency signals before the rotors turn, ensuring your flight remains controlled from start to finish.
What to Wear and Bring for Maximum Comfort
Flying a microlight aircraft victoria falls puts you in an open cockpit where wind and temperature shift with altitude. I always advise passengers to dress in layers, because the Zambezi valley feels warm on the ground then cools once you climb. Lightweight fabrics keep you agile, while closed shoes protect your feet during takeoff and landing. Scarves, hats, and loose accessories stay at the base, since the wind will take them.
What you carry should remain minimal:
– Sunglasses with a secure strap or snug fit
– A light windbreaker or fleece layer, depending on the season
– A camera with a wrist or neck lanyard to capture the falls
– Sunscreen, because open air does not dilute the sun
Preparation here is simple. Comfort comes from knowing exactly what the sky demands of you before the rotors begin to turn.
Weight Restrictions and Health Considerations
Every microlight aircraft victoria falls operator enforces strict weight ceilings, often 115 to 120 kilograms per passenger. These limits exist because the aircraft’s balance and fuel load depend on precise mass calculations. Confirm your weight during booking, and be honest if you are near the limit.
Health preparation matters equally. Conditions that require medical clearance before flying include:
- Recent abdominal or chest surgery
- Uncontrolled high blood pressure
- Severe osteoporosis or disc problems
- Pregnancy, especially beyond the first trimester
The flight itself produces moderate G-forces and vibration, which can aggravate these issues. Your pilot will also review hand signals and harness adjustments during the pre-flight briefing. Listen carefully; the process is straightforward.
Pre-Flight Briefing and Pilot Expertise
So, you’ve cleared the weight check, signed the waivers, and your stomach is doing a decent impression of a washing machine on spin cycle. This is where the pre-flight briefing saves your sanity. The pilot will walk you through every phase, from takeoff to the moment your wheels kiss the ground again. This is not a casual chat over coffee. It is a precise, methodical run-through that covers emergency protocols, communication signals, and what to do if you suddenly feel the urge to grab the pilot’s arm like a stress ball. The brief takes about ten minutes and removes virtually all guesswork.
Your pilot’s expertise is the silent engine of the entire experience. These are not weekend hobbyists. They are seasoned aviators with hundreds, sometimes thousands, of hours logged in microlight aircraft victoria falls airspace. They know the thermal currents that rise off the Batoka Gorge and the wind patterns that swirl around the spray. Their hands are on the controls, but their eyes are always scanning for changing conditions. A solid pre-flight briefing will cover several key points:
- Hand signals for speed adjustment and direction changes
- Harness tightening procedures and quick release mechanics
- Camera handling rules, including when it is strictly forbidden
- What to expect during banked turns and slight altitude changes
Trust their judgement. When they say the wind is picking up and it is time to land, they are not being cautious for the sake of it. They are calculating weight, fuel, and weather in a fluid equation that changes by the minute. You get to enjoy the view; they get to manage the physics. Listening to their briefing and respecting their call is the smartest thing you can do for a flawless flight.
Understanding Insurance and Liability
Insurance might seem dull next to the Baobab trees and the spray. But it matters. Operators in Victoria Falls carry third-party liability cover. This protects you if something goes wrong on board. Your waiver also protects them. It outlines risk and responsibility clearly.
Here is what you should check before booking:
1. The operator’s air operator certificate is current.
2. Third-party liability covers passenger injury.
3. Your travel insurance includes adventure activities.
4. Personal accident cover fills any gap.
Ask for the policy summary. Reputable operators hand it over without hesitation. The waiver you sign does not strip your rights. It simply records that you understand the risks of microlight aircraft victoria falls flights. Read it twice. Then sign. Understanding that paper is the final step in your preparation.
Best Times and Weather Conditions
Seasonal Weather Patterns and Their Impact on Flights
Water volume transforms the experience on a microlight aircraft victoria falls flight more than any other factor. The Zambezi peaks around April, sending spray towering over the gorge, while by October the river slackens and the chasm’s walls appear with startling clarity. Each season carries distinct trade-offs for pilots and passengers.
- May to August: stable air, cool mornings, and reduced spray for optimal visibility
- September to November: rising heat creates afternoon thermals, so book sunrise slots
- December to March: thunderstorm season brings dramatic skies with erratic wind patterns
Scheduling during the early hours consistently yields the most comfortable flight, as convection builds later in the day and the spray column expands with warming temperatures.
Morning vs. Afternoon Flights: Which Offers Better Views
The hour you choose to fly shapes what you see as much as the season. On a morning microlight aircraft victoria falls flight, the low sun turns the spray golden, and the Batoka Gorge’s shadows sharpen against its walls. Afternoon flights trade that clarity for raw power; the Zambezi’s mist columns swell with heat, occasionally swallowing the falls entirely.
Consider what matters more to you:
- Morning: crisp air, longer shadows, and a higher chance of seeing rainbows arching over the main falls
- Afternoon: more turbulent thermals, softer light, but a muted palette where spray diffuses everything
For photographers, mornings win. For sensation seekers, the afternoon’s extra bumpiness adds an edge to the experience. Either way, booking a microlight aircraft victoria falls slot at sunrise or sunset keeps you clear of the worst midday heat.
Visibility and Photography Lighting Tips
The thermal currents over the Batoka Gorge tell you more than any forecast ever could. A stable high pressure system brings the glassy air that makes a microlight aircraft victoria falls flight feel effortless, while a passing front kicks up the chop that rattles the airframe. Visibility rarely drops below ten kilometres, but the harmattan haze that drifts down from the north in August can turn the horizon milky. For photography, the light does the heavy lifting. The low golden hour rays cut through the spray and throw rainbows across the chasm, but the midday sun flattens every shadow and washes out the greens of the riverine forest.
– Watch the wind direction; a southwesterly breeze pushes spray toward the gorges and obscures the view
– Aim for a January morning after a light rain, when the air is washed clean and the falls are at full throat
The interplay of mist and light changes by the minute, so keep your camera ready between adjustments by the pilot. A polarising filter helps, but do not overdo it, as the spray plays tricks with exposure. The best images come from the moments when the sun breaks through a cloud bank and ignites the columns of water below. Trust the ground crew when they say the weather is turning, because they fly this river every day. Their call on whether to launch is worth more than any satellite app.
Special Considerations During High Water or Dry Season
The Zambezi does not know moderation. During high water, from February to July, the falls can push over 500 million litres per minute into the Batoka Gorge. The resulting spray plume climbs 400 metres, and a microlight aircraft victoria falls flight becomes a wetter, more dynamic encounter. The updrafts strengthen, the controls feel more alive, and the entire gorge disappears behind shifting curtains of mist.
Dry season, from August to January, inverts the experience. The mist retreats, exposing the basalt cliffs and the sharp geometry of the river below. The views gain a crystalline clarity, but the lower water volume changes how the air moves. Thermal currents from the bare rock behave differently, and the pilot adjusts the flight line accordingly.
Consider these points when booking around the water cycle:
- Trust the ground crew’s judgment on wind direction, especially in high water when the spray can obscure the entire flight path.
- In dry season, book a morning slot to catch the low sun before the gorges become hazy.
Cost, Booking, and Logistics
Pricing Structures and Package Deals
Pricing for a microlight aircraft victoria falls flight depends on flight duration, season, and whether you bundle it with other adventures. Standard trike flights start around USD 160, while extended gyrocopter routes climb to USD 300 or more.
Booking directly with operators often secures the best rate, but package deals through local lodges can include transfers and park entry fees. Payment is usually cash or card, and deposits secure your slot.
- Book at least 48 hours ahead in high water season
- Confirm weight limits at booking
- Check cancellation policies before paying
Logistics are straightforward from Victoria Falls town. Operators collect you from your hotel, drive to the airstrip near the gorge, and return you within three hours.
How to Book in Advance for Guaranteed Slots
Slots for a microlight aircraft victoria falls flight vanish quickly in peak months. The airstrip operates a limited number of departures daily, and each trike carries only one passenger. Securing your place means committing early.
I recommend booking the moment your travel dates are firm. Operators open their calendars roughly three months ahead, and high water season sees those slots fill within days. A small deposit locks your time, usually 20% of the total.
Before you pay, have these details ready:
- Your exact date and preferred morning or afternoon window
- Your weight and height for the pre-flight checklist
- Your hotel name for the courtesy pickup
A confirmed slot removes uncertainty. You arrive, you fly, you leave. No waiting around.
Getting to the Launch Site and Parking
The cost structure for a microlight aircraft victoria falls flight deserves honest scrutiny. I have seen travellers assume the quoted price covers everything, only to be billed separately for the transfer. Most operators quote an all-inclusive rate, but confirm whether the hotel transfer is folded into that figure. Self-drive visitors face minimal costs at the launch site. Parking is free, and the gravel approach requires no special vehicle.
Getting to the launch site is straightforward. From town, follow the signs towards the main airport, then turn at the private airstrip marker. The drive takes about twenty minutes. Parking bays sit adjacent to the departure point.
Before payment, operators typically confirm these details:
- Whether the quoted cost includes the courtesy pickup
- If surcharges apply for high water season dates
The proximity also means you can watch a microlight aircraft victoria falls flight depart while your pilot completes the pre-flight checks.
Duration of the Entire Experience from Arrival to Takeoff
Arriving twenty minutes before your slot feels leisurely until you realise the launch site has its own rhythm. The entire spectacle, from gravel crunch under your wheels to the moment your microlight aircraft victoria falls flight lifts off, typically spans forty minutes. That includes pilot introductions, harness adjustments, and the mandatory safety chat that somehow always takes longer than promised.
- Ten minutes for check-in and paperwork
- Fifteen minutes for pre-flight briefing and kit fitting
- Fifteen minutes for taxi and final checks
Booking a microlight aircraft victoria falls adventure is usually a WhatsApp conversation away. Pay a deposit, receive a confirmation, then simply arrive early. The quoted price is generally the price you pay, though the launch site carries no card facilities. Bring cash for incidental extras like fuel levies, just in case.
Cancellation Policies and Refund Options
Regarding cancellations, most operators accept changes up to 48 hours before your microlight aircraft victoria falls flight. Weather remains the great equalizer. If conditions turn unfavourable, the operator typically reschedules rather than refunds. That works in your favour because the falls offer spectacle in both rain and shine.
Deposits are usually non refundable, but they hold their value. You can shift your microlight aircraft victoria falls booking to a different day without penalty, provided you give adequate notice. The day before your flight, confirm the forecast. The launch site team will also contact you if the morning looks doubtful.
For last minute cancellations, the full amount becomes payable. That is standard practice across the industry. Travel insurance covering adventure activities is your safety net. It protects you if illness or unforeseen circumstances force you to miss your slot.
Capturing Memories
In-Flight Camera Equipment and Mounting Options
The spray from the falls has a way of finding your lens. A basic waterproof housing or a simple rain sleeve will protect your camera during a microlight aircraft victoria falls flight. I speak from experience.
For mounting, a wrist strap is essential. The open cockpit offers no place to set anything down. Many pilots allow cameras on head straps or helmet mounts, but confirm with your operator beforehand.
Consider these practical additions:
- polarising filter to cut glare off the water
- spare batteries, since cold air drains them faster
- a lens cloth for the persistent mist
A 24-70mm lens covers the wide vista and the closer views of the gorge without forcing you to swap lenses mid-air. Shutter speed matters more than aperture. Keep it above 1/1000th of a second to freeze the spray. The microlight aircraft victoria falls flight gives you one continuous pass, so frame each shot quickly.
Professional Photo and Video Packages
Most passengers land with 47 photos of a rainbow and one very wet lens. The professional photo and video packages exist to rescue your memory from that fate.
An onboard camera operator or a fixed wing-mounted unit captures the flight, so your hands stay free. You get edited footage in crisp resolution. For a microlight aircraft victoria falls flight, this matters more than gear.
- raw and edited files
- 4K video with stabilisation
- aerial shots timed to the spray
The price covers what you cannot shoot yourself. You are too busy holding on.
Tips for Sharing Your Experience on Social Media
After the engine cuts, the sound of the falls stays with you longer than any video clip. The footage on your phone is shaky, wet, and real. That is the one to post first. Raw holds more power than polished when the subject is already spectacular.
A microlight aircraft victoria falls flight offers a perspective no drone can legally match. Share the sequence in order. Takeoff, the first glimpse of the spray, the turn over the gorge. A chronological story keeps viewers in your seat.
Match the format to the platform. Portrait for Stories. Landscape for the feed. Caption the post with the specific flight type and time of day. That context draws more engagement than generic hashtags. Your microlight aircraft victoria falls videos outlast the upload. Posted well, they become the reason someone else books the flight.
Creative Angles and Composition Ideas
The spray catches the light at a different angle every minute. Frame your microlight aircraft victoria falls flight with the wingtip in the foreground to establish scale. Shooting across the pilot’s shoulder adds a human element that grounds the scale of the gorge.
Compose with intention. Three angles consistently deliver strong results:
- The wingtip frame, which gives the viewer a physical reference point.
- The pilot’s profile, which brings a human story into the landscape.
- The rear-facing view over your shoulder, capturing the full sweep of the falls.
Let the falls occupy the lower third, the gorge cut through the middle, and the sky hold the top. That structure creates depth in one frame. The mist behaves like a living subject, shifting as the aircraft banks.
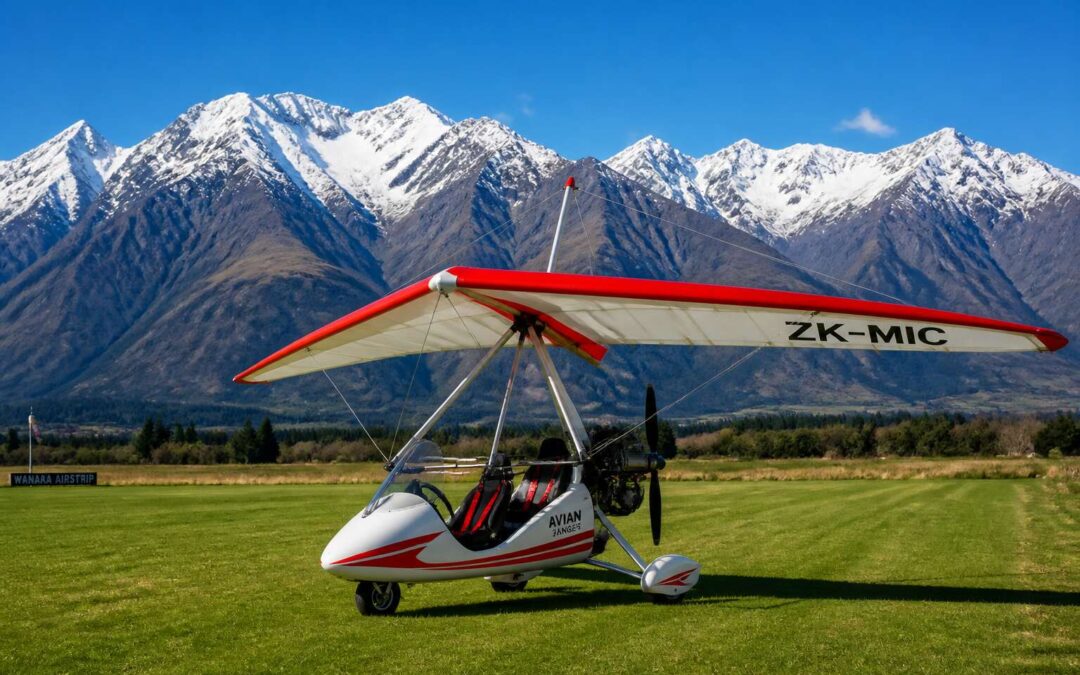
by | Sep 21, 2026 | Blog
Understanding the Microlight Aircraft Landscape in New Zealand
The South Island’s airstrips cling to valleys that seem to forbid flight entirely. Yet microlight aircraft for sale new zealand continue to shift hands steadily, because they thrive where conventional planes cannot.
Understanding the landscape means grasping the weather patterns. Coastal winds, mountain thermals, and sudden cloud formations all shape what pilots need in a lightweight aircraft. One pilot told me the real skill is reading the sky, not the instrument panel! That practical knowledge separates casual enthusiasts from serious buyers, and it influences every purchase decision.
Demand has shifted toward models with folding wings, as hangar space remains scarce. The regal gyrocopter and the flex-wing design each attract different temperamental profiles, but both serve the same end: exploring this archipelago from the air. When evaluating microlight aircraft for sale new zealand, the choice comes down to how a machine handles a specific region’s turbulence, rather than its top speed.
Types of Microlight Aircraft You Can Buy
Choosing a microlight is as much about personality as it is about payload. There is the classic weight-shift style, which rewards a pilot with raw, unfiltered feel, and the more docile three-axis machine, which suits those who prefer their flying to be precise. When you scan the market for a microlight aircraft for sale New Zealand, you will notice several configurations, each with a distinct reason for existing.
Some buyers chase a bargain on a second-hand machine. Others want a factory-fresh aircraft with a full warranty. For clarity, here are common categories:
– Weight-shift trikes, which are affordable and easy to store.
– Three-axis fixed-wing models, which offer better crosswind handling.
– Factory-assembled aircraft, which carry a higher price but also a heftier registration chase.
Each type presents a different character. Weigh your comfort level, your budget, and your tolerance for assembly. The right one will sit in your hangar with quiet confidence.
Legal Requirements and Compliance for Owners
Picture the Southern Alps from five thousand feet, the air thin and crisp. Owning a microlight here is a visceral joy, but that joy is underpinned by a stern legal framework. In South Africa, your obligations begin before you even turn the ignition. The South African Civil Aviation Authority (SACAA) mandates that every aircraft, even a microlight, must have a valid Certificate of Airworthiness and be registered to a legal entity. This is not a suggestion; it is a firm requirement.
You must navigate the regulatory landscape with diligence. For imported machines, particularly those you might find when searching for microlight aircraft for sale new zealand, the process involves a full import clearance and a local conversion inspection. Your paperwork must be meticulous, as any discrepancy can ground your aircraft for weeks. Here are the core documents you will need to manage:
– A completed application for registration (CAA form AC-001).
– Proof of ownership, such as the original Bill of Sale.
– An Airworthiness Certificate issued by an approved person.
– A valid Pilot’s Licence with a microlight rating.
Beyond the hangar, compliance dictates how you fly. You are bound by the General Aviation Regulations, which enforce minimum safe altitudes and strict weather minima. The rules require you to log every flight with your organisation, and your maintenance schedule must follow the manufacturer’s schedule to the letter. This discipline is your invisible co-pilot, ensuring that the freedom of the sky is never at the cost of safety. When you consider the purchase of microlight aircraft for sale new zealand, remember that the legalities are your first true flight check.
Financial Considerations and Ownership Costs
The purchase price of a microlight aircraft for sale new zealand rarely tells the whole story. I have watched buyers celebrate a low upfront cost, only to flinch at the first annual inspection bill. Ownership is a series of fixed payments that accumulate silently.
Here are the recurring costs to examine:
- Hangar storage or tie-down fees
- Insurance premiums tied to your pilot experience
- Reserve funds for engine overhauls and replacement parts
Each line item demands discipline. For a South African buyer, the currency exchange adds another layer of unpredictability when importing or maintaining an aircraft abroad. Plan for the long term because expenses recur without warning.
Where and How to Find the Right Aircraft
Finding a microlight aircraft for sale new zealand from South Africa is a test of patience. You sift through online listings, dealer websites, and forum posts. Most are vague. Some are scams. The good news? A few minutes of focused digging beats hours of random browsing. Start with trusted aviation marketplaces and the New Zealand dealer network. Then verify every detail through official channels. A quick check with the Civil Aviation Authority of New Zealand clears up registration questions. Now, when you narrow down the options, inspect these things:
- Airframe hours and maintenance log
- Engine compression and oil analysis
- Corrosion or delamination on wings
Ask sellers for a video walkaround. If they refuse, walk away. Waste no time on pretty paint. Focus on the structure underneath. That approach never fails.